


Footwear, Crafting, Upholstery and Beyond
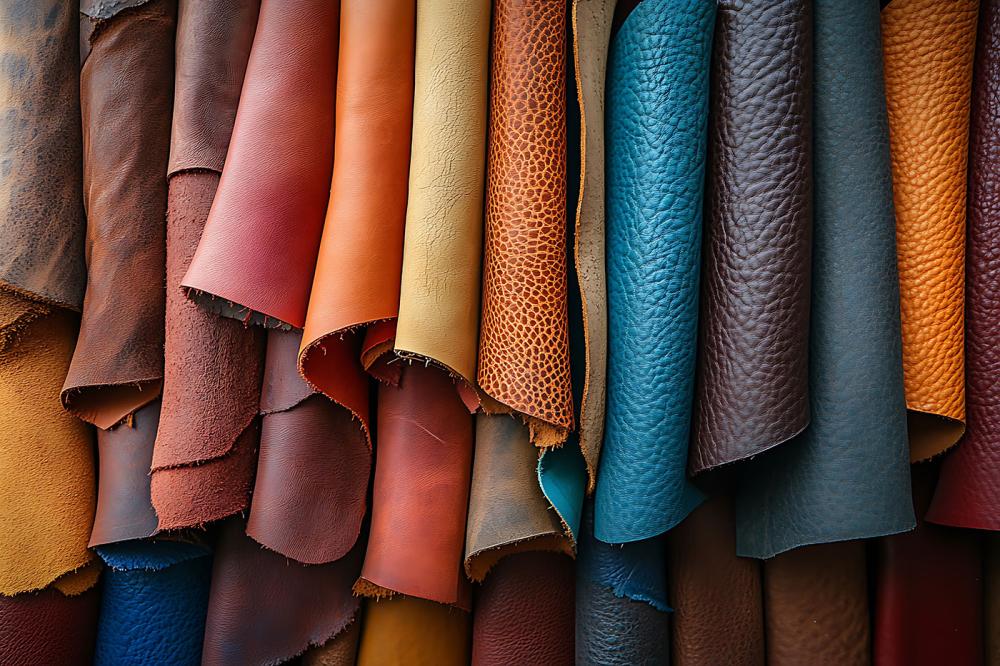
Leather is one of humanity’s oldest and most versatile materials. For millennia, it has been used for everything from footwear and clothing to toolmaking and art. Even in the modern era, leather remains prized for its durability, flexibility, and unique aesthetic – qualities that derive from the leather’s natural fibrous structure and the tanning processes that preserve hides.
Today, artisans and manufacturers can choose from a wide variety of leather types (including traditional vegetable-tanned leathers and modern chrome-tanned hides) as well as synthetic leather alternatives and even bonded composite leathers. This comprehensive guide is designed to help both beginners and experienced professionals navigate the world of leather.
We will cover the major types of leather, their properties, benefits and drawbacks, and best use cases. We’ll also provide practical, step-by-step advice on working with each type – including tips on cutting, skiving, shaping, stitching, glueing, finishing and caring for leather – and dive into application-specific recommendations for footwear, leather crafting, upholstery, and niche uses (such as orthotic leatherwork and sensory tools).
Clear safety, sustainability, and sourcing considerations are included throughout to ensure you can work with leather effectively, safely, and ethically. Let’s begin by understanding the different types of leather and what makes each type suitable for particular projects.
Types of Leather and Their Properties
Leather varies widely depending on how it’s tanned or manufactured. The tanning method (or alternative fabrication in the case of synthetics) affects the leather’s feel, strength, workability, and ideal uses. Below we describe the major categories of leather – vegetable-tanned, chrome-tanned, oil-tanned, synthetic (faux) and bonded – including their characteristics, pros and cons and typical applications.
Leather Thickness Guide (oz → mm)
Quick rule: 1 oz of leather ≈ 1/64 inch ≈ 0.4 mm. Leather is often described by ounces, which is a thickness measure, not the weight of a piece.
| Leather weight (oz) | Inches (approx.) | Millimetres (approx.) | Typical uses |
|---|---|---|---|
| 1–2 oz | 0.016–0.031″ | 0.4–0.8 mm | Linings, lightweight garments, bookbinding, small accessories. |
| 2–3 oz | 0.031–0.047″ | 0.8–1.2 mm | Wallet interiors, card holders, glove leather, lightweight bag panels. |
| 3–4 oz | 0.047–0.063″ | 1.2–1.6 mm | Wallet exteriors, soft handbags, small upholstery panels, light shoe uppers. |
| 4–5 oz | 0.063–0.078″ | 1.6–2.0 mm | Handbags, aprons, pouches, moccasins, general leather goods. |
| 5–6 oz | 0.078–0.094″ | 2.0–2.4 mm | Sturdier bags, light belts/straps, light sheaths, utility cases. |
| 6–7 oz | 0.094–0.109″ | 2.4–2.8 mm | Standard belts, dog leads/collars, holsters/sheaths, small saddlery. |
| 7–8 oz | 0.109–0.125″ | 2.8–3.2 mm | Heavy belts, tack, motorcycle seats, robust straps. |
| 8–9 oz | 0.125–0.141″ | 3.2–3.6 mm | Gun belts, heavy sheaths, stirrup leathers (light), rugged straps. |
| 9–10 oz | 0.141–0.156″ | 3.6–4.0 mm | Harness parts, heavy belts, mid-sole lifts, durable working gear. |
| 10–12 oz | 0.156–0.188″ | 4.0–4.8 mm | Harness & saddlery, protective panels, midsoles/sole build-ups. |
| 12–14 oz | 0.188–0.219″ | 4.8–5.6 mm | Outsoles (lighter styles), heavy straps, armour/costume work. |
| 14–16 oz | 0.219–0.250″ | 5.6–6.4 mm | Very heavy outsoles, clog soles, industrial/rigging applications. |
Exact conversions (per ounce)
1 oz = 1/64″ ≈ 0.016″ ≈ 0.4 mm • 2 oz ≈ 0.031″ ≈ 0.8 mm • 3 oz ≈ 0.047″ ≈ 1.2 mm • 4 oz ≈ 0.063″ ≈ 1.6 mm • 5 oz ≈ 0.078″ ≈ 2.0 mm • 6 oz ≈ 0.094″ ≈ 2.4 mm • 7 oz ≈ 0.109″ ≈ 2.8 mm • 8 oz ≈ 0.125″ ≈ 3.2 mm • 9 oz ≈ 0.141″ ≈ 3.6 mm • 10 oz ≈ 0.156″ ≈ 4.0 mm • 11 oz ≈ 0.172″ ≈ 4.4 mm • 12 oz ≈ 0.188″ ≈ 4.8 mm • 13 oz ≈ 0.203″ ≈ 5.2 mm • 14 oz ≈ 0.219″ ≈ 5.6 mm • 15 oz ≈ 0.234″ ≈ 6.0 mm • 16 oz ≈ 0.250″ ≈ 6.4 mm.
Note: Thickness varies naturally across a hide and by tannage (e.g. vegetable vs chrome) and temper (soft/firm). Treat the “typical uses” as guidance, not strict rules—your design, hardware, and finishing will also influence the best thickness.
Vegetable-Tanned Leather
Description & Properties:
Vegetable-tanned leather (often abbreviated veg-tan) is tanned using natural plant tannins (from sources like oak bark, chestnut, or mimosa). It is one of the oldest leather-making methods, dating back thousands of years. Veg-tan leather has a firm, thick structure with an initially pale earthy tone that darkens with time and use.
Notably, it develops a rich patina – a gradual darkening and sheen – as it ages, picking up oils from handling and deepening in colour. This leather has a distinctively pleasant “leather smell” due to the natural tannins. It is durable and can be quite stiff in thicker weights.
A key feature of veg-tan is its absorbency: it readily soaks up water (and other liquids like dyes or oils), which allows it to be water-moulded, stamped, or carved with intricate designs in ways chrome leather cannot.
However, this absorbency also means veg-tan is not naturally water-resistant – it will tend to soak up moisture “like a sponge,” which can be a drawback in wet conditions. Veg-tan leather is also somewhat sensitive to heat (excess heat can cause it to become brittle or shrink).
Benefits:
Vegetable-tanned leather is prized for its strength and structure – it holds its shape well, making it ideal for projects that need rigidity (belts, straps, cases, holsters). It ages beautifully, gaining character with use (the patina effect).
It is eco-friendly relative to chrome leather, since it’s tanned with organic materials rather than heavy metals. Veg-tan leather also takes dye well (its open pore structure readily accepts dyes or stains), allowing artisans to achieve rich colours or hand-dyed finishes. Because it can be moistened and tooled, it’s the go-to leather for traditional leather carving, embossing, and stamping work.
Drawbacks:
The main drawbacks are water sensitivity and initial stiffness. Unless treated, veg-tan will absorb water and can warp or stain from moisture. Prolonged soaking can even lead to shrinkage or hardness once it dries. It requires finishing or waxing if you need it to be water-repellent. It can also be less forgiving to work in some ways – for example, folding thick veg-tan without thinning (skiving) the fold line can result in cracks, due to its stiffness.
Additionally, the traditional tanning process is time-consuming and costly, so vegetable-tanned leather often costs more than chrome-tanned equivalents.

Working Veg Tan Leather
Best Uses:
Owing to its firmness and aging qualities, veg-tan is the top choice for belts, straps, harnesses, and saddlery, knife sheaths and holsters, sturdy wallets or journal covers, and any project that will be carved, tooled, or embossed. It’s also commonly used for shoe soles and insoles, and in traditional bespoke footwear (as we’ll discuss later, many high-end shoes use veg-tanned leather for the soles and structural elements).
Veg-tan’s ability to be wet-formed makes it ideal for cases and molded projects (like forming a veg-tan leather mask or a rigid box). If you want an item to last decades and gain a vintage look with time, veg-tan is a great option.
Working with Vegetable-Tanned Leather:
When working with Veg-Tan, a few practical considerations will help you get the best results:
- Cutting: Because it tends to be thick and firm, ensure your cutting tools are very sharp. Use a utility knife or leather knife for straight cuts (with a metal ruler as a guide), or heavy shears for thinner veg-tan (up to 4mm). For very thick leather, it’s often best to cut in multiple light passes with a knife rather than forcing through in one go. Always cut on a proper cutting surface (self-healing mat or thick plastic board) to protect your blade and achieve clean cuts . Also, keep the blade perpendicular to the leather for a square edge . Veg-tan cuts can be edge beveled and burnished (smoothed) easily after cutting, producing a professional finish on edges.
- Skiving: Skiving is the process of thinning the leather at certain areas (e.g. folding points or edges). Veg-tan leather skives relatively well because it’s firm and fibrous. A simple safety skiver with replaceable blades can be used to pare down thickness where needed . For example, when making a belt, you might skive the buckle end fold so it lies flat, or skive the edges of a pouch before folding and stitching to reduce bulk. Take shallow, controlled cuts – veg-tan will yield to a sharp skiving knife, but avoid skiving too deep too quickly. (Specialty skiving knives are available for precision, though these are more expensive.) Always skive on the flesh side (the rough inner side), not the grain side.
- Shaping (Wet Molding and Tooling): One of the greatest advantages of veg-tan is how it can be shaped with water. To wet-mold, evenly dampen the leather (often by spraying with water and letting it penetrate until the leather is pliable – called “casing”) . At the proper moisture level, veg-tan will bend and stretch and can be formed over a mold or last. It will harden into that shape as it dries. For example, to make a knife sheath or a mask, you can soak the veg-tan, then stretch and press it around the object or form, securing it until dry in the desired shape.
When tooling or stamping patterns, veg-tan must also be correctly cased: too wet and impressions will be mushy, too dry and you won’t get a burnished imprint. A good practice is to wet the leather uniformly, let it return to near-original color (feels cool but not visibly very dark), then stamp or carve – this yields crisp, dark impressions. Always wet all pieces of a project equally, even those you don’t plan to tool, to avoid uneven color uptake later . Once shaped or tooled, allow the veg-tan to dry slowly at room temperature (fast drying with heat can cause it to become overly stiff or even brittle). - Stitching: Thick veg-tan often requires pre-punching stitching holes. You can use a pricking iron or diamond chisel to drive holes through for hand stitching . This leather is usually too tough to sew on a home machine (for heavy veg-tan projects, hand saddle stitching is common). A stitching groover can be used to cut a shallow line so stitches sit flush and are evenly guided . Veg-tan holds stitches well and, being quite stiff, it won’t bunch or stretch as you sew. Use strong thread (waxed linen or braided poly) and consider using a stitching pony clamp to hold the work. If using a sewing awl for saddle stitching, keep it sharp and at a consistent angle.
- Gluing: Because of its porous flesh side, veg-tan bonds strongly with most leather adhesives. It’s usually easy to glue flesh-to-flesh surfaces . Applying a thin layer of contact cement or leather glue along seams (and letting it get tacky) before stitching is recommended; it holds the pieces in perfect alignment as you sew . Be careful not to get glue on the grain (top) surface, as it can leave a permanent dark spot and resist dye/finish in that area . If you must glue grain-to-grain, lightly roughen or skive the surfaces to give the glue something to “bite” into. Clamp or press the glued pieces and let dry fully for a secure bond.
- Finishing: Veg-tan leather is usually sold in a natural, untreated state, so finishing is a crucial step. After constructing your item, you will typically dye and/or seal the leather. Dyeing: Veg-tan takes both water-based and alcohol-based dyes readily . Always test dye on a scrap of the same leather (since colour results can vary on different leathers). You can apply dye with a cloth, sponge, or brush – whatever gives an even coat . After dyeing, buff the leather with a rag to remove excess pigments.
Then apply a finish/sealant: this could be a specialized leather topcoat (matching the type of dye used, e.g. water-based finish over water-based dye). Finishing coats seal in the dye (so it won’t rub off on hands or clothing) and add resistance to water and wear. Common finishes include acrylic resolene, wax-based balms, or oils. For a natural look, you might simply oil the leather with neatsfoot or mink oil which both darkens and preserves it. - Edge Finishing: Veg-tan edges can be beveled (rounded) with an edge beveler and then burnished – a process of rubbing the edge with a slicker (often wood or bone) and a bit of water or gum tragacanth to compress and smooth the fibers . Burnishing yields a smooth, shiny edge . You can also apply a bit of beeswax during burnishing for a glossy sealed edge . (Note: Only veg-tan or other unfinished leathers can be burnished like this; finished leathers cannot be burnished in the same way, so they often require a different edge treatment.) We’ll discuss that under chrome-tanned leather. Finally, if the veg-tan item will see rough use or weather, consider a water-resistant wax finish or conditioner as a last step (for example, finishing a tooled belt with a coat of resolene for shine and water protection, then a light coat of leather conditioner).
- Care: Vegetable-tanned leather goods benefit from periodic care. Over time, they can dry out, so conditioning with a leather balm or oil keeps them supple. A good leather conditioner penetrates and replenishes oils – for instance, a treatment with neatsfoot oil or a wax-based conditioner every few months (or when the leather feels dry) will prevent cracking and keep veg-tan leather strong for decades. Remember that oils will usually darken the leather (part of the patina process). Veg-tan items should be kept dry in use – while a bit of rain won’t ruin them if they’re sealed, it’s wise to wipe water off sooner than later. If the leather does get soaked, let it air-dry slowly at room temp (don’t use high heat) and then condition it. Also, avoid prolonged direct sunlight which can darken or discolor veg-tan unevenly. With proper care, veg-tanned leather articles often last a lifetime and develop a treasured vintage look instead of looking worn-out.
Chrome-Tanned Leather
Description & Properties:
Chrome-tanned leather is tanned using chromium salts and other chemicals, a process invented in the mid-19th century. This quickly became the dominant tanning method worldwide – 80–90% of today’s leather is chrome-tanned – due to its speed and efficiency.
Chrome tanning can produce a leather in a matter of days (versus weeks or months for veg tanning). The resulting leather is typically soft, flexible, and heat-resistant. Chrome-tanned hides tend to have a smooth, often polished surface and can be made in a huge range of vibrant colours (the process takes dye readily and fixes color stably).
They are generally more water-resistant than veg-tan – while not fully waterproof, they won’t absorb water as quickly or deeply. Chrome-tanned leather does not develop the same patina as veg-tan; it remains closer to its original colour throughout its life (this can be a pro or con depending on your goal). It also tends to be softer in temper – even thick chrome leather is more pliable and less stiff than vegetable equivalents.
This makes it ideal for many applications where flexibility is needed (like garments or upholstery). The downside is that chrome-tanned leather often has a finished coating or pigments that prevent tooling or stamping; it’s not suited to carving and embossing the way veg-tan is.
Quality of chrome leather can vary enormously – from cheap, fragile “genuine leather” splits used in budget products to luxurious full-grain calf used by high-end shoemakers. (There are many grades, so one must be careful in sourcing – a chrome tan leather can be incredibly durable and beautiful, or it can be garbage, depending on the hide and process.)
Generally, high-grade chrome-tanned leathers have excellent durability and a smooth supple hand.
Benefits:
Chrome-tanned leather is valued for its suppleness and comfort – it breaks in quickly without a long stiff phase. It’s less sensitive to water and will not easily be ruined by a bit of rain or sweat (many chrome leathers are at least semi-water-repellent by virtue of their fat liquors and finishes) . It also handles heat better (it won’t shrivel with a bit of warmth as veg might).
Colour selection is a big plus:
Chrome tanning allows for bright, vibrant and uniform colours, including colors that are difficult to achieve in veg-tan. If you need a leather in a specific hue (blue, red, etc., or a very consistent black), chrome-tan is usually the answer . The leather is softer and often thinner (for a given weight) in feel, which is ideal for clothing, fashion accessories, linings, and upholstery where a stiff leather would be a drawback . It’s also typically cheaper than veg-tan because of faster production and the abundance of supply. For example, chrome-tanned cowhide is widely available and often sold under names like “upholstery sides,” “garment leather,” etc., at moderate prices.
Drawbacks:
A key drawback of chrome tanning is the environmental impact: it involves toxic chemicals (chromium salts, acids) and if effluents are not handled properly it can pollute water and soil . Reputable tanneries treat their waste, but historically chrome tanning has been harsh on the environment.
Another downside - chrome-tanned leather does not age with a patina – it tends to look roughly the same over time until it eventually wears out. Some people miss the “character” that veg-tan develops. Also, because the leather often has a finished surface, you can’t easily re-dye or tool it.
Deep scratches in pigmented chrome leather may reveal a differently colored crust underneath (since the color is often applied as a coating). Repairing or refinishing chrome-tan can be tricky. When it comes to working, chrome leather can be stretchier and more challenging to cut with precision (the same pliability that’s great in use means it can stretch out of shape while you’re cutting or sewing, unless you support it). And remember that not all chrome leather is equal – cheap chrome-tanned leather can be weak or prone to cracking if the tanning wasn’t done well or if it’s a split with heavy coating.
Always choose a trusted source, especially for critical projects.
Best Uses:
Because of its softness, chrome-tanned leather is the top choice for clothing and wearables: jackets, gloves, bags, wallets (especially with a more pliable feel), and shoe uppers (the vast majority of modern shoes use chrome-tanned uppers) . It’s also heavily used in upholstery – car seats, sofas, office chairs – where its suppleness and water resistance are advantageous . Lighter chrome-tan skins (like lamb or goat) are popular for garments and linings.
Many fashion accessories (handbags, watch straps, etc.) use chrome-tan for its colour variety and soft hand. Essentially, if you need a soft leather that drapes or conforms, chrome-tanned is likely the way to go. It’s also commonly used for shoe linings (for comfort) and for lightweight wallets or purse interiors.
We should note that suede and nubuck leathers are often chrome-tanned as well – these are finishes where the leather is buffed to a nap (suede from the flesh side, nubuck lightly from the grain). They share the general characteristics of chrome-tan (soft, receptive to vibrant dye) and are used in similar applications (garments, shoes, upholstery), albeit requiring different care (as they have a fuzzy surface).
Working with Chrome-Tanned Leather:
Working techniques for chrome leather differ from veg-tan in a few important ways:
- Cutting: Chrome-tan leathers, especially in medium to light weights, can often be cut with good scissors in addition to knives. A sharp pair of leather shears works well for pliable leather with curves where a knife might be tricky . The key when cutting soft leather is to prevent stretching: always lay the leather flat on a cutting mat or table (don’t hold it in the air while cutting, as this causes distortion). If using a knife, a rotary cutter can be excellent for long straight cuts on chrome leather, as it rolls through without dragging the leather. For very stretchy or floppy leather (like a thin deerskin), sometimes placing tissue paper beneath or even lightly gluing the leather to paper can stabilize it for cutting precise shapes (you later remove the paper). Use lighter pressure and multiple passes with a knife if needed, because a single heavy cut on a soft leather can cause the material to bunch in front of the blade. Always keep your free hand clear – soft leather can suddenly give way and you don’t want the blade running toward your fingers.
- Skiving: Many chrome-tanned leathers are thinner to begin with, but when you do need to skive (for example, thinning an edge for a turned seam or reducing bulk at a fold), note that chrome leather is a bit tougher to skive evenly. Its fibers are often more flexible and sometimes there’s a grain-layer finish to cut through. A very sharp skiving knife is required, and it may feel more like scraping away the leather gradually. There are also bench skivers (splitting machines) that can thin chrome leather uniformly – these are used in industry for things like thinning edges of handbag leather. If you don’t have a machine, take shallow skiving cuts and avoid tearing – chrome leather doesn’t “slice” as cleanly as veg, but it can be thinned. Alternatively, one common approach in chrome-tan projects is to avoid raw edges by folding the leather instead of skiving and burnishing (for instance, folding the edge of a chrome leather purse strap and sewing it down, rather than leaving the edge exposed). This eliminates the need to skive for edge finishing, though you might still skive the turn-under area to keep it from being too bulky.
- Shaping: Traditional wet-molding is not really feasible with chrome-tan – it doesn’t hold a shape when wet; it will just stretch out and then largely flop back when dry. Chrome-tanned leather is hydrophobic relative to veg, so water doesn’t penetrate deeply enough to reshape the fiber structure significantly . That said, you can do some forming: e.g. for shoes, chrome-tan uppers are lasted (pulled over a shoe form) while dampened slightly and allowed to dry, and they will retain the stretched shape to a degree.
But you won’t get the crisp, rigid form that veg-tan achieves. If you need a firm structure in a chrome-tan project (say, a soft leather bag that you still want to stand up), you’ll likely use an internal stiffener (like a piece of veg-tan or a synthetic board) rather than relying on molding the chrome leather. As for stamping/tooling: you generally cannot tool finished chrome-tan leather – the surface is often coated and the leather is too soft to take an impression. One exception: if you have undyed, unfinished chrome leather (sometimes called “crust” leather), you could stamp it, but this is uncommon for crafters. In practice, consider chrome-tan unsuitable for carving or stamping designs; use surface techniques like embossing with a press or laser engraving for decoration instead, or sew on appliqués. - Stitching: Chrome-tanned leather is usually easier to pierce with needles than veg-tan. You can often sew lighter weights (up to ~2mm thick) on a home sewing machine fitted with a leather needle. The feed on the machine might struggle if the leather is very sticky or soft; using a walking foot or Teflon foot can help the leather feed through without catching. Hand stitching chrome leather is also common – you can use pricking irons or a chisel to pre-make holes (especially useful for thicker chrome leathers or if doing saddle stitch by hand). The process is similar to veg-tan, though you might notice chrome leather holes don’t hold their shape as sharply (the material is more likely to close up around the thread).
Waxed thread helps here, as it lubricates the passage. A stitching spacer (over-stitch wheel) can mark your stitch intervals on chrome leather; dampening the leather slightly before using the wheel can give clearer marks . One caution: because chrome leather can be stretchy, be careful not to pull your stitches too tight – you can actually create a puckered seam by stretching the leather with the thread. Aim for firm but not cinched-down stitches. If machine-sewing, use a slightly longer stitch length than you would on fabric (to avoid creating a perforation line).
Typically 3–4 mm stitch length is good for medium weight leather. Also consider using a backing paper or tape when sewing very soft chrome leather on a machine – it can prevent the leather from getting chewed up or stuck; you tear it away after stitching. - Gluing: Many chrome-tanned leathers have a smooth, sometimes glossy grain surface, which can make gluing tricky (glue adheres better to rough, porous surfaces). It’s often best to glue the flesh side to flesh side if possible – e.g. when making a seam, fold both edges and glue the sueded inner sides together. If you need to glue grain-to-grain, abrade the surface with sandpaper or a skiver to remove finish . Contact cements (solvent-based) tend to work well with chrome leather; rubber cement or PVA-based leather glue can also work if the surface is prepared.
Use thin layers of glue to avoid squeeze-out, since any excess on a chrome-tan’s top surface will be very obvious and usually cannot be removed without marring the finish . Another tip: because chrome leather is flexible, glued joints might creep – always let the glue fully cure and consider clamping or weighting the pieces to prevent any shifting while it sets . When lining chrome leather (say bonding a fabric or another leather to it), a common technique is to glue then stitch around the perimeter for security, since long-term the glue alone might not hold if the item flexes a lot. - Finishing Edges: Unlike veg-tan, you cannot burnish the edges of most chrome-tanned or finished leathers to a smooth sheen – the fibers won’t meld nicely and the finish on the leather may crack or peel if you try. Instead, chrome leather edges are typically finished by either edge painting or turning/folding. For edge painting, you use a special edge coat (polyurethane paint like Edge Kote or similar) applied to the raw edge to seal and color it . This works well after lightly sanding the edge for evenness.
You apply multiple coats, sanding in between, to build a smooth edge. Many high-end brands finish chrome leather goods with beautifully painted edges since it gives a very clean look and you can match or contrast the edge color to the leather. The other method, folding, means you skive the edge thin, fold it over to the inside, and glue/stitch it down – thus presenting a folded crease on the outside rather than a raw edge . This is seen in wallets, bag flaps, etc., and avoids any exposed suede edges.
Both methods hide the rough fibers which can otherwise look “hairy” on chrome leather . If you do leave a raw edge on chrome-tan (for a casual item), you can’t really get it glassy-smooth, but you can slick it a little: apply gum tragacanth and rub with canvas – it will reduce fuzziness but won’t shine like veg. Often, though, a raw edge on chrome will remain a bit fuzzy or have a painted look if you choose to apply edge coat. - Finishing Surface: Usually chrome-tanned leather comes pre-finished from the tannery (dyed in colour and often with a topcoat). This means you usually don’t need to dye or seal it – the leather is ready to go, aside from perhaps a light conditioning after your work is done. If you do have unfinished chrome leather (rare for end users), you’d follow the manufacturer’s guidelines for dyes (many chrome leathers are drum-dyed in production, and further coloring isn’t needed).
For most chrome leather projects, once you’ve assembled the item, you may just apply a conditioner or a protective cream to the surface to ensure longevity. For example, a bag made of chrome-tan might be given a light coat of leather balm to enrich the colour and then buffed. Be cautious with products on pigmented leather – test in a small area, as some creams can eat into certain finishes or make them tacky. Generally, stick to products recommended for finished leather surfaces. A neat trick for glossy chrome leather: you can often simply buff it with a soft cloth to bring out shine, since it likely has a finish already. - Care: Chrome-tanned leather items are relatively low-maintenance. They don’t dry out as quickly as veg-tan, so conditioning can be less frequent. However, they still benefit from care: use a leather conditioner or cream occasionally to keep them supple (particularly for chrome leather that is aniline or semi-aniline, which means it has some open pores that can absorb conditioners). Keep chrome leather clean by wiping it with a damp cloth; for dirt or stains, use a pH-neutral leather cleaner.
Because chrome leather often has a protective coating, heavy oils are not needed (and can sometimes sit on the surface). Instead, use products designed for that type of finish – for example, a mild conditioner for pigmented leather seats. Avoid high heat and very low humidity storage, which can cause even chrome leather to stiffen over time. One more note: some people have chrome allergies (sensitivity to chromium VI). High-quality chrome leather from reputable tanneries usually has negligible residual chromium VI, but cheaper leathers might cause skin irritation in rare cases. For items in close contact with skin (like watch straps or shoe linings) for sensitive individuals, consider chrome-free leather (often veg-tan or special aldehyde-tanned) – we’ll touch on this in orthotic uses.
Oil-Tanned Leather
Description & Properties:
Oil-tanned leather refers to leather (often initially chrome-tanned) that is then treated with oils and waxes as part of the finishing process. Historically, there were leathers tanned entirely with fish oils (such as certain buckskins), but in modern terms, oil-tanned usually means a chrome-tanned leather infused with heavy oils/waxes. A famous example is Horween’s “Chromexcel,” which is a combination tanned leather stuffed with oils.
Oil-tanned leathers tend to be soft, pliable, and water-resistant – the oils impart a degree of waterproofing and a distinctive pull-up effect (the colour lightens when the leather is bent as oils redistribute). They often have a slightly waxy or greasy feel to the touch and a matte or dull finish (as opposed to glossy).
Commonly, oil-tans are medium to heavyweight cowhides used for boots, outdoor gear, and rustic leather goods. They can resemble Veg-Tan in thickness but are much more supple due to the oils. These leathers are typically not meant to be highly fancy or colorful – they come in earthy tones (browns, tans, blacks), often with a natural look.
Because of the oil content, they repel water better than standard chrome leather and stay flexible even in cold conditions (where a dry leather might stiffen). One might also encounter the term “oil-tanned nubuck” – a nubuck leather that has been oil-finished, giving it a velvety yet water-resistant surface.
Benefits:
Oil-tanned leather is excellent for rugged, outdoor applications. It is highly durable and handles exposure to the elements well (the oils prevent it from drying out and help resist moisture penetration) . It doesn’t scuff as easily – or when it does, many scuffs can be simply rubbed out with a bit of warmth from your finger (the oils redistribute and darken the scratched area).
The leather is usually soft and broken-in from day one, making it comfortable for wear (hence its use in work boots and gloves) . It also tends to be low maintenance – it generally won’t require frequent conditioning because it’s already oil-rich. Oil-tan leathers often have that “rugged” look people like, with natural variation and a heritage feel. They can be tough – a good oil-tanned boot leather can last for years of hard use.
Drawbacks:
The trade-off for the oiliness is that these leathers have limited color options and finish . You won’t find bright or delicate colours; oil-tans are mostly browns, black, or occasionally a deep red/olive. Also, because of the oils, they do not take additional dye well – trying to dye an oil-tanned leather is usually ineffective (the oils prevent absorption).
You’re basically “locked in” to the colour it comes in. Oil-tanned leather can sometimes bleed oil or wax slightly, especially when new – you might notice a bit coming off on a rag or even on clothing if the leather is excessively oily (most are finished enough that this is minor, though).
Additionally, gluing and finishing edges can be a bit challenging due to the oil content (surfaces may need degreasing for the glue to stick). If you want a very polished, shiny look, oil-tans aren’t for that – they’re more casual in appearance. Finally, very high heat can draw out the oils – e.g., don’t leave oil-tanned gear on a radiator or you may find oils migrating to the surface or evaporating, after which the leather could stiffen.
Best Uses:
Oil-tanned leathers shine in footwear (boots and work shoes), outdoor gear like tool pouches, knife sheaths (especially for wetter environments where pure veg might rot or stiffen), belts (latigo is an example of a veg-and-oil tanned strap leather), saddlebags, motorcycle bags, and tack, and gloves or aprons that need to be both soft and durable.
They’re also popular for rustic-style bags (e.g. a waxy hunter’s satchel) and for leather jackets in styles like motorcycle jackets, where you want some water resistance and a vintage look. Essentially, if an item will see harsh conditions or you want that classic “distressed” look, oil-tanned is a good choice.
Working with Oil-Tanned Leather:
From a working standpoint, oil-tanned leathers behave somewhat like other chrome-tans with a few special considerations:
- Cutting: The presence of waxes/oils means oil-tan leather is usually a bit firmer to cut than an equally thick fashion chrome leather (the fibers are lubricated but also heavier). Use a very sharp blade and expect a bit of drag (you might feel the wax). It cuts fine with a knife or heavy scissors. Since many oil-tans are thick (for boots, etc.), a knife and straightedge is your friend for straight cuts. If cutting multiple layers (like clicking out pattern pieces), you may need to clean your blade periodically as some wax can deposit on it. Always cut on a stable surface; oil-tan leather often has a slightly suede-like flesh side that grips the cutting mat nicely, so that helps prevent slipping. Be aware that fine details (tiny strap slits, etc.) can be more difficult to achieve cleanly if the leather is very oily and soft – edges might not stay perfectly crisp because the material has a bit of give.
- Skiving: Skiving oil-tanned leather can be a little harder because the leather tends to be tough and stretchy. A super sharp skiver is needed, and even then the wax can make the blade want to slip rather than bite. If you must skive, sometimes warming the leather slightly can soften the wax and make it easier to cut. Skive in small increments – the waxy fibers will peel off in a somewhat stringy manner. Often, oil-tan projects are designed to avoid a lot of skiving (e.g. thick seams are left as-is or alternatives like using thinner trim pieces are chosen). If you have a piece like Chromexcel you want to skive, take it slow and expect to sharpen your blade more often (the added fat content can actually dull blades faster).
- Stitching: Oil-tanned leather generally stitches beautifully. It’s supple enough to sew by machine (given a capable machine) and by hand it’s pleasant because it’s not as hard on the hands as veg. The oils lubricate the needle and thread to some extent. If hand sewing, use a bit of caution: the wax from the leather can accumulate on your needle or awl, so wipe them occasionally to keep your tools penetrating smoothly. Also, marking stitching lines or holes can be tricky since the surface may be dark and a bit oily – a silver marking pencil or pricking iron imprints work well; scratch awl lines can disappear if the leather self-heals. Consider using diamond chisels to punch holes for hand sewing; they will create clean holes even in soft, oily leather.
Those holes might close up a bit due to the leather’s elasticity, but you’ll still see them. When machine sewing, a standard leather point needle (triangular point) works. You might find you need slightly higher thread tension because the wax can make the thread slide more easily – test and adjust your machine accordingly. One advantage: knots and backstitches hold nicely in oil-tan because the waxy leather tends to grip the thread (and you can even melt the thread’s tail into the wax a bit if using synthetic thread to seal the stitch). On the flip side, adhesive tapes used to hold seams (a common sewing trick) don’t stick well to oily leather – rely on clips or temporary stitches instead of tape. - Glueing: Here’s a big point: oil and glue don’t mix well. Before glueing oil-tan leather, prepare the surface. You can wipe the bonding area with isopropyl alcohol or deglazer to strip some oils, or lightly sand it, or both. Even then, expect a weaker bond than with veg or standard chrome. Contact cement is generally the most effective adhesive for oil-tans (it’s solvent-based and bites better into the material). Apply thin coats to both surfaces, let dry to tacky, then press firmly.
If the leather is very oily, you might find the cement doesn’t want to dry (the oils keep it “wet”); in that case, multiple light coats (letting each dry) can build a layer that will hold. Another trick is to use a polyurethane glue (like certain shoe repair glues), which can sometimes cure despite oil. In any case, glueing is often used only to position pieces for stitching in oil-tan projects – don’t rely on glue alone for structural joints. For example, when making an oil-tan knife sheath, you’d glue the halves together to hold them, but definitely stitch or rivet as the primary hold. If you get glue on the grain, it’s even more troublesome than on veg because you can’t dye over it – and wiping it off is hard without removing the leather’s oils. So use masking (like wax paper method) to apply glue cleanly. - Finishing Edges: Oil-tanned edges can be finished, but not by the usual veg-tan burnishing alone – the oils both help and hinder. On one hand, the waxes can self-seal the edge somewhat when you burnish. You can often get a decent burnish by rubbing the edge with a canvas or wood slicker vigorously; the heat softens the waxes, which then set, yielding a somewhat smooth edge. It won’t be glassy, but it can be made clean. Some oil-tan crafters actually prefer to sand edges and leave them raw for a rugged look, since the edges won’t fray terribly (the wax keeps fibres in check).
If you want a more refined edge, you can still use edge paint – it will usually adhere if you first wipe the edge with alcohol to remove oils, and maybe give a light sand for grip. Because oil-tans are often dark, a black edge paint can give a uniform look. A technique: lightly torch the edge with a flame (very quickly) to singe off fuzz, then apply edge paint. This can work well as the heat also dries the surface a bit. In summary, edge finishing is optional; many oil-tan goods are fine with cut edges (the softness means they won’t be sharp). If it’s a wearable item like a strap and you want comfort, consider beveling the edges with an edge beveler to round them. The beveler should cut fine – if it slides off due to wax, again a quick wipe with alcohol can give it some bite. - Surface Finishing: Typically, oil-tanned leather does not need additional finishing. It arrives pretty much ready to go: already infused with wax/oil that act as a finish. You wouldn’t normally dye it (as noted, dyes won’t take well). You also don’t usually seal it with something like Resolene – that would counteract the nice feel and might not even stick. Instead, after your item is done, you might just buff it and maybe apply a tiny bit of a compatible conditioner. For example, a boot made of oil-tan leather might periodically get a light coat of mink oil or a leather oil to refresh the water-resistance. Be cautious: adding too much oil can over-saturate and weaken leather. Usually, these leathers are good to go for a long time without any product. If the finish scuffs, often rubbing with a cloth or finger will restore the colour (pull-up effect). You can also use neutral shoe cream to polish out scratches. One thing to avoid is acrylic finishes or heavy topcoats – they just won’t bond properly and will alter the intended waxy character of the leather. Embrace the fact that oil-tan will show wear and marks, as part of its charm. For care, if it ever does get very dry (like after years, or if exposed to lots of sun), a dubbing or wax-based conditioner is ideal to replenish it.
- Care: As mentioned, oil-tanned leather doesn’t need frequent conditioning – it was essentially “pre-conditioned” at the tannery. But over a long time, or if it gets thoroughly soaked and then dries out, you should re-oil it. Use a product similar to what was in it originally: e.g., Neatsfoot oil or a beeswax-based dressing for heavy oiled leathers. Keep the item clean by brushing off dirt (dirt can draw out oils or cause abrasion). If it gets muddy, just use a damp cloth to wipe and then let it dry; a bit of conditioner afterwards will ensure the mud didn’t strip too much oil.
Avoid storing oil-tan leather on absorbent materials (like paper or cardboard) in heat, as they can wick oils out. Also, avoid plastic bags for storage – the leather could become mouldy if trapped with moisture (this applies to all leather, but oil-rich leather especially since mould feeds on oils). In general, these leathers are meant to be used hard; they often look even better after a bit of rough treatment, as they develop a rugged patina (not a glossy patina like veg, but a worn-in personality). If a piece ever loses some of its water-resistance (you notice water no longer beading on the surface), it’s time to apply a leather oil or waterproofing wax to the surface to refresh it.
Faux Leather
Synthetic Leather (Faux Leather)
Description & Composition:
Synthetic leather – also known as faux leather, vegan leather, PU leather, or pleather – is not animal leather at all, but a material made from plastic and fabric designed to mimic the look of leather. The two main types are PVC (vinyl) and PU (polyurethane) based faux leathers. Both typically consist of a textile base (often polyester) coated with a plastic layer that is embossed with a grain pattern.
PVC is an older form of faux leather; it’s generally stiffer, less breathable, and often used in things like cheap upholstery or book bindings. Polyurethane-based faux leather is more modern and tends to be softer, more flexible, and slightly more breathable, making it common in fashion (jackets, etc.).
Synthetic leathers come in a huge variety of finishes and colours – they can be made to visually imitate nearly any type of leather or even have outlandish textures/patterns not found in nature. The key property of faux leather is that it is usually uniform and consistent (every sheet looks the same), and it is completely non-porous (no fibre structure like real leather).
This means it does not breathe (no moisture passes through), and it does not develop patina; its appearance is the result of its plastic surface and will remain the same until that surface physically degrades. Faux leather is generally cheaper than real leather, though high-end synthetic leather (used by some automotive or furniture companies) can cost more than very low-end genuine leather.
Benefits:
The obvious benefit for some is that no animals are used, which is important to vegetarians/vegans and those avoiding animal products. Synthetic leather can also have a very consistent quality – no natural scars or hide variations to work around. Large pieces are available (some in rolls much wider than an animal hide), which is convenient for upholstery or big projects.
Faux leather is usually easy to clean – because it’s plastic, you can wipe it with a damp cloth and mild soap without worrying about water damage (it won’t absorb spills). It often has high stain resistance for the same reason. In some cases, faux leather can be more durable to abrasion than genuine leather – for instance, a quality PU leather might resist scratches better than a very soft genuine lambskin (though it depends on the product) .
Faux leather also tends to be less expensive and offers endless colours and textures (since it’s manufactured, you can get bright patent finishes, metallic sheens, etc., easily). It’s widely used in areas where cost or uniformity is key, like mass-produced furniture or budget fashion.
Drawbacks:
The primary drawback is reduced longevity and repairability. Synthetic leather does not age gracefully – when it wears, it often cracks or peels and cannot be restored (unlike real leather, which can often be reconditioned) . The plastic layer can eventually lose its elasticity, or the backing can separate, leading to peeling flakes (we’ve all seen old fake leather peeling like paint). Its lifespan is usually measured in a few years of use before this happens (though high-grade PU leathers can last longer, upwards of 5-7 years in furniture, for example).
Another issue: it can be uncomfortable in heat – because it doesn’t breathe, it can make you sweat and then feel sticky (think of sitting on a vinyl seat in a hot car). It also lacks the genuine feel and smell of real leather; some might find it fine, others find it obviously artificial. From a maker’s perspective, one challenge is that once punctured or cut, the material has no self-healing – a needle hole in faux leather is there forever (and can even act as a tear start).
You have to plan stitching carefully because you can’t undo and re-sew in the same holes without weakening them. Also, cheap faux leathers can be weak, tearing at stress points or fraying at edges where the fabric backing shows. Finally, although no animal hides are used, synthetic leather is made of plastics (PVC or PU), which are petroleum products and not biodegradable, so sustainability is a complex question (we address that later in sustainability considerations).
Best Uses:
Faux leather is widely used in upholstery for furniture and automotive (especially vinyl in car seats, restaurant booths, etc., where durability and easy cleaning are needed). It’s also common in fashion: lower-cost handbags, wallets, shoes, and jackets often use PU leather to get a leather-like look at a fraction of the cost. In bookbinding and accessories, bondage gear or costumes often use vinyl for the shiny look. Medical and rehab equipment sometimes use vinyl coverings because they can be sanitised easily (for instance, treatment tables, some wheelchair seats – here faux leather is practical for hygiene).
Faux leather can also be good for craft practice – if you want to practice stitching or pattern-making without using expensive real leather, vinyl can serve for testing. Essentially, if you need a material that looks like leather but need to keep costs down or need waterproofing and don’t require decades of longevity, synthetic leather is an option. It’s also chosen by those who ethically avoid animal products.
Working with Synthetic Leather:
Working with faux leather involves techniques closer to fabric/upholstery work, with a few unique points:
- Cutting: Faux leather can generally be cut with ordinary scissors very easily (especially thinner PU types). For thicker upholstery vinyl, use heavy-duty scissors or a rotary cutter for long straight cuts. Always cut with the material face down on a cutting mat to avoid marring the finish. One thing to note: the cut edges of faux leather often expose the fabric backing – these edges tend to be weaker than the surface (the plastic may delaminate a bit from the backing if pulled). So plan your pattern to minimise critical stress on cut edges or plan to finish them. Also, be mindful that vinyl can dull blades faster than leather, because you’re cutting plastic. Change or sharpen blades as needed. When cutting, avoid making notches by clipping into the edge as one might with fabric – that could start a tear. Instead, mark any match points with chalk or a tiny dot on the backing. If your faux leather has a stretch (some PU fabrics stretch a bit), cut pieces in the correct orientation (often you want the stronger direction of the backing running along straps, etc.).
- Skiving: Generally, you don’t skive synthetic leather. The material is usually produced in the needed thickness, and trying to skive it would just remove the plastic layer (ruining the finish) or leave the fabric backing flimsy. If you need a thinner piece, it’s better to use a thinner faux leather product from the start. One exception: sometimes you might thin the edge of a very thick vinyl by sanding the backing a bit – for example, to reduce bulk in a seam overlap. This is done carefully with a Dremel or sandpaper on the fabric side, taking care not to go through the face. But that’s a specialised approach. In most cases, plan construction to avoid needing skiving (for instance, use folds and tucks rather than thick seams, or use hardware instead of folding thick vinyl).
- Shaping: You cannot wet-mould faux leather (water does nothing to plastic). Heat shaping is somewhat possible with certain vinyls – gentle heat can make them more pliable and you could potentially stretch it a bit. For instance, cosplay makers sometimes heat PVC leather to mould it over a form. Caution: too much heat will melt or warp it permanently. Always test a piece if attempting to heat. In general, faux leather doesn’t hold a shape – it lacks the internal fibre memory of real leather. So any shape is imparted by your pattern and seams, not by moulding. However, one nice property is that faux leather doesn’t shrink with moisture or change with humidity, so what you sew is what you get; there’s no forming or casing needed.
- Stitching: Sewing synthetic leather can be done by hand or machine. Machine sewing is very common: use a heavy-duty machine or a home machine that can handle the thickness. One big tip: the presser foot tends to stick on vinyl/PUs, because the surface is rubbery. A Teflon presser foot or using a roller foot can prevent sticking, or even placing tissue paper between the foot and vinyl can help (tear it away later). Also, use longer stitch lengths – about 3.5 to 4 mm for most seams – because short stitches can create a perforation line like tearing a paper ticket. You want fewer holes to maintain strength. Never backstitch excessively in one spot (it can cut out a little pseudo “coupon” of material). Instead, lock stitches by leaving tails and hand-knotting, or by very carefully backstitching only 2-3 stitches. Thread: use a strong synthetic thread (polyester) because it will endure any moisture (cotton thread may rot over time in vinyl since you can’t oil it like leather).
- Hand stitching: If you choose to saddle stitch faux leather by hand (for, say, a decorative piece), treat it like you would leather: use a pricking iron to make holes (though in vinyl the holes won’t close up at all, so any mis-hole is visible). It’s actually a bit harder to hand stitch because the material is sort of bouncy – the needle might gum up if the vinyl is sticky. Waxed thread still works though, and the saddle stitch will look nice. But note: saddle stitching is often overkill for synthetic – the material itself may give out before the stitching does, and since aesthetics can often be achieved with machine topstitching, that’s the usual approach. Lining and support: faux leather by itself can be floppy, so bag makers often reinforce it with interfacing or a second layer of fabric. You can fuse a woven interfacing to the back of thinner PU leather to give it body; just use a low heat setting and a pressing cloth so as not to melt the plastic.
- Glueing: Many adhesives do not bond well to the plasticky surface of faux leather. Contact cement can work, especially if you roughen the surfaces slightly. There are speciality vinyl glues (like those for PVC pool liners) that form very strong bonds – for crafting, a polyurethane glue or even superglue can sometimes be used for small joins. Generally, glueing is used sparingly, mostly for placement before sewing. One common practice in bag making with faux leather is to use double-sided tape (specifically designed for fabrics/leather) to hold seams or hems in place instead of glue – the tape sticks well to the plastic and doesn’t require drying time.
If you do glue, rough the surface by lightly sanding the areas to be joined (careful not to sand beyond where the seam will hide, as it’ll mar the finish). Clamp or weigh the pieces while the glue cures, since faux leather tends to spring apart otherwise. Also, remember that any glue on the front is nearly impossible to remove without damaging the finish, so mask diligently and wipe any excess immediately. Faux leather usually doesn’t absorb glue, so the glue will either stick or not, but not soak in – that means drying times might be faster (or infinite if it never chemically bonds). Test your adhesive on a scrap: some solvents in glue can even dissolve certain vinyls (especially PVC). In summary, glue cautiously and rely on stitching or mechanical fastening for strength. - Finishing Edges: The raw edges of faux leather typically show a fabric backing or a different colour core, which can look unfinished. There are a few ways to handle edges:
- Folding and Sewing: Often the best-looking method – you fold the edge to the inside and stitch it down, so no raw edge is visible. This is how many upholstery seams and garment hems are done with vinyl. It requires that your material is thin or that you skive/sand the edge thinner to avoid bulk.
- Edge Paint: You can use the same edge paints as on real leather. In fact, edge paint sticks pretty well to the fabric backing because it soaks in a bit and then the plastic surface on the sides holds it. Apply multiple coats and sand in between for a smooth result, just like on leather. This is good for things like belt edges or bag straps made of faux leather.
- Leave Raw: In some cases (especially for purely decorative or where the backing is similar colour), you might just leave the edge as-is. Vinyl won’t fray, but the fabric backing might (often the backing is knit or non-woven which doesn’t fray much). You can carefully singe the backing fibres with a lighter to cauterise them if needed.
- Binding: Another technique from upholstery: wrap the edge with a bias tape or a strip of leather/faux leather as a binding. This covers the raw edge entirely.
- In all cases, remember that exposed edges are weaker – the plastic layer can peel from the backing starting at an edge if under stress. So for straps or weight-bearing uses, prefer folded edges or a stitched binding for strength.
- Surface Finishing: Faux leather comes pre-finished. You do not dye or oil it. At most, after sewing, you might polish it lightly with a silicone spray or vinyl conditioner to give it a sheen or to ensure it’s not dry. Armour-all (for vinyl car dashes) is sometimes used on vinyl upholstery to keep it supple, but be cautious using any such product on a wearable item (it could transfer or leave a film). If your stitching made any holes that you want to seal (to be extra waterproof), there are vinyl patch clear liquids that can dot-seal a hole, but usually not necessary. If the faux leather gets a cut or scratch that reveals the fabric below, unfortunately, there’s not much you can do to truly fix it – unlike genuine leather, you can’t polish or dye scratches. The best is a patch or some creative repair (like glueing a decorative piece over it).
- Care: Taking care of faux leather mostly involves cleaning and being gentle to avoid surface damage. Clean with a damp cloth or use a mild soap solution for dirty spots. Do not use strong solvents or alcohol cleaners; they can make the material brittle or strip its topcoat. PU leather, especially, can be sensitive to alcohol. Keep faux leather away from heat sources – heat can cause it to warp or the PU to get sticky. If a faux leather jacket or bag gets soaked, simply wipe it off; there’s no need for conditioning, and in fact, it won’t absorb any (applying leather conditioners is pointless on faux and can even discolour it).
Do not fold faux leather sharply for storage, as it can form permanent creases or cracks at the fold – store hanging or loosely rolled. Over time, expect some cracking in areas that flex a lot (like the bend of a faux leather shoe or the seat of a chair). Once tiny cracks appear, keep the item clean and possibly use a vinyl conditioner to slow further cracking. But ultimately, know that faux leather has a finite lifespan; when it starts peeling, replacement is usually the only option. On the plus side, it doesn’t require the careful regimen of genuine leather – no conditioning, no avoiding rain (just wipe dry), and no mould issues (unless the backing fabric mildews, which is rare because the plastic keeps moisture out).
Bonded Leather
Description & Composition:
Bonded leather (also called reconstituted leather, composition leather, or sometimes misleadingly just “genuine leather”) is a material made by taking leather waste (scraps, shavings, fibres), grinding them into a pulp, and then bonding that with polyurethane (or latex) onto a fibre sheet or paper backing.
In essence, it’s like particle board made of leather fibres. The surface is often embossed with a pattern and painted to look like leather. Bonded leather typically contains only 10–20% actual leather content – the rest is plastic and fillers . It’s very uniform in appearance and usually comes in sheets or rolls.
Visually, bonded leather can initially look quite like real leather (since the surface may contain leather dust and an embossed grain). However, you can often tell by the back: the backing might be a fabric or paper, and the material is thinner and more plasticky-feeling than full leather. Quality-wise, bonded leather is the lowest grade of “leather” product. It was developed as a way to use waste scraps cheaply.
Benefits:
The main benefit is cost – bonded leather is extremely cheap compared to full-grain leather. You can get large pieces for a low price. It’s also easy to cut and sew because it’s basically a consistent sheet (no tough grain to penetrate). It often has a uniform colour and finish with no natural imperfections – useful if you need a very even look across a large area (this is why some inexpensive furniture is covered in bonded leather – all the pieces match perfectly in texture).
Another minor benefit is it can be marketed as “real leather” content, which sometimes misleads consumers into thinking it’s better than faux (though in reality, a good faux might outlast bonded!). Bonded leather is also somewhat easy to clean on the surface – similar to vinyl, you can wipe it (provided the surface coating is intact).
Drawbacks:
Bonded leather’s drawbacks are significant: it is not durable and tends to crack and peel with only moderate use. Because the leather fibres are bound by a relatively weak resin to a paper/fabric backing, over time, the surface will start flaking off. Typically, within 2-5 years of normal use, bonded leather upholstery will peel and show the fuzzy backing. It cannot be reconditioned or truly repaired (once the bonding fails, you can’t glue those fibres back).
It also lacks the strength of real leather – a thin bonded leather strap, for example, would tear easily because the fibre network is not continuous like in genuine leather. Bonded leather often has a synthetic feel and smell – notably, it may emit a strong chemical odour (especially when new), unlike the pleasant natural leather smell. It doesn’t breathe, and the surface can feel like plastic.
Aesthetically, while it starts uniform, as soon as it wears a bit, it looks far worse than aged real leather – chunks can peel off, revealing fuzzy greyish material underneath. In short, it’s not a long-term material.
Best Uses:
Given its limitations, bonded leather is best used in low-wear applications or decorative elements. For instance, it might be okay for a portfolio cover, a notebook binding, or decorative trim that won’t be flexed often. It’s also seen in some budget belts (usually as a stiffener in the middle of a layered belt) – though those belts often crack at the holes quickly.
In upholstery, bonded leather is used on parts of furniture that don’t get heavy use (like the sides or back of a sofa) to save cost, while real leather is used on the seat cushions – a practice sometimes called “leather match”. If you are prototyping or practising, bonded leather could be a cheap material to cut or experiment with, but expect to throw it away rather than making a heritage item. In summary, use bonded leather only where you need the look of leather at rock-bottom cost, and durability is not crucial.
Working with Bonded Leather:
Working with bonded leather is somewhat similar to working with a heavy cardstock or thin fiberboard with a coated surface:
- Cutting: Bonded leather, being relatively thin and uniform, cuts easily with scissors or a utility knife. Use sharp tools to avoid ragged edges because the internal fibre mix can produce a “fuzzy” edge when cut. If you compress the cut edge (for instance, with a ruler while cutting), you might get a cleaner cut. One issue is delamination – sometimes cutting can cause the top layer (the polyurethane/leather fibre mix) to separate slightly from the backing at the very edge. Make sure your cutting blades are sharp and try to cut in one pass to minimise this. After cutting, you might see some loose fibre dust; you can gently flame the edge or apply a bit of edge paint to stabilise it.
- Skiving: You generally cannot skive bonded leather – it’s already a composite of set thickness. If you try to shave it down, you’ll likely tear the fibres out of the matrix and ruin the surface. If you need a thinner piece, you’d be better off using a different material or trying to split it uniformly (maybe running it through a splitter machine, though bonded leather might crumble in that process). Essentially, take bonded leather as-is; do not plan to skive or mould it.
- Shaping: Bonded leather cannot be wet-formed and has no stretch or give for forming. It’s quite paper-like in that sense. It will bend along a crease if you force it, but that crease will likely become a weak point where cracking happens. If you need to cover a form (like wrapping bonded leather around a box corner), do so by making relief cuts or seams as you would with a stiff fabric – do not expect it to stretch around curves. Also, avoid repeatedly flexing the material in any spot – that accelerates the breakdown of the bonded matrix. There is no benefit to casing it with water (it’s actually somewhat water resistant on the surface, and water could weaken the backing). Heat is also not useful except maybe to slightly soften the resin for wrapping around something, but careful: too much heat can melt the surface or make it bubble.
- Stitching: You can sew bonded leather, but bear in mind that holes have low tear strength. Use longer stitches (like 3-5 mm) to reduce perforation risk. If hand sewing, don’t tension the thread super tight – you could literally tear through the material like a cheese slicer. Also, backstitch minimally because that cluster of holes can start a tear. It’s wise to reinforce stitch areas if possible: for example, if making a simple bonded leather pouch, line the bonded leather with a thin fabric; the fabric will take some strain off the holes.
In machine sewing, use a standard needle (even a sharp fabric needle works since there’s no tough grain; a leather needle is fine too). One advantage: no need for a special foot – the top surface is usually not sticky, it’s pretty smooth, so it feeds well. The appearance of stitches on bonded leather is usually quite neat since it’s uniform; however, the holes might show some fuzz (the internal fibres). If that happens, you can take a lighter and very carefully singe the fuzz on the inside of a hole (if it’s, say, a belt hole) but this is rarely needed for stitch holes. In general, plan stitching in low-stress areas or use it cosmetically. For high-stress joints, consider using rivets or other hardware instead of solely relying on stitching – a rivet spreads the load a bit more and might delay tearing. - Glueing: Bonded leather often has a smooth finished top and a fuzzy back (the fabric or pulp backing). If you need to glue, glue on the fuzzy side if possible – it will accept glue like paper does. PVA (white) glue works on the back for crafts, or contact cement on either side. Glue joints in bonded leather are usually as strong as the material itself (which is to say, moderate). Because the surface is essentially plastic-coated, glueing anything to the top surface is unreliable unless you rough it up. If you’re doing, say, a lining, apply glue to the back side of bonded leather and to the lining material, then press. It should stick fairly well since the back is porous. But again, glue should often be accompanied by stitching if strength is needed.
One thing: don’t oversaturate with glue, especially water-based, because the backing paper can absorb too much and weaken. A thin, even layer is best. Also, be careful: bonded leather edges glued together might hold at first, but if you flex the joint repeatedly, the brittle nature can cause the glue to pop off along with some leather fibre (like delaminating layers of cardboard). In short, use glue for positioning and light duty, but rely on structural supports for real strength. - Finishing Edges: Raw edges of bonded leather reveal the fibrous interior and often the backing material, which is not attractive. Edge paint can be very useful here: a coat or two of edge paint will conceal the multi-layer look and lock in loose fibres. Since bonded leather typically comes in dark colours, a black or brown edge paint can blend nicely. You might lightly sand the edge before painting to make it even. You won’t get a beautiful burnish because the fibres aren’t dense enough, and there’s no solid grain to burnish against – attempts to burnish just make the edge fuzzy. If you don’t have edge paint, another approach is to cover the edge by folding or binding: e.g., wrap a thin strip of real leather or fabric over the bonded leather edge and glue/stitch it.
This is obviously more work and is rarely done except in upholstery, where bonded leather panels are seamed. If it’s a straight edge on something like a book cover, you can also consider turning it under: peel a little of the backing off to reduce bulk, fold the edge over to the back side and glue it down. This gives a nicer finished edge (but requires a bit of material allowance, and the bonded leather must be pliable enough). - Surface Finishing: Bonded leather comes with a finished surface (often polyurethane coating). You typically do not alter that. You can’t really dye bonded leather – the surface won’t accept dye uniformly (it’s like trying to dye plastic). You also shouldn’t oil or condition it with leather conditioners; they won’t penetrate the plastic top layer and the backing doesn’t need it (if anything, oil could weaken the bond or make the backing soggy). If you want to seal the surface or change the sheen, you could apply something like a polyurethane clear coat or acrylic finish, but it’s generally unnecessary and may even hasten cracking by adding another layer of film. Essentially, treat it as you would synthetic leather in terms of finish – it is what it is out of the box. If you have a cut edge or an exposed backside you want to make nicer, you could glue a thin lining over it.
- Care: Bonded leather should be cared for more like a synthetic than a genuine leather. Keep it clean with a damp cloth. Avoid any leather conditioners or saddle soap – these could discolour or degrade the composite. If used on furniture, keep it out of direct sun and heat to prolong its life (heat can cause the bonded resins to break down faster, and UV can make the surface brittle and faded). If you see early signs of peeling or cracking, unfortunately, there’s not much that can be done to reverse it. Sometimes, very small peeling spots on furniture can be patched with vinyl repair kits (essentially a colored glue painted on), but it’s usually temporary. The best “care” is gentle use: don’t let it get heavily abraded or flexed. For example, a bonded leather belt will last longer if it’s mostly decorative; if you cinch it tight daily, it will likely crack at the holes soon. Also, keeping it clean of sweat and oils (from skin) might help, since those can slowly penetrate and weaken the bond in the material. Realistically, bonded leather is not for heirloom pieces – treat it kindly and enjoy it while it lasts, but expect a limited service life.
Leather Types
Summary of Leather Types
To recap, vegetable-tanned leather offers superb durability, structure, and ages with character – ideal for traditional crafts and items that need strength and form (but keep it dry). Chrome-tanned leather is soft, flexible, and versatile, great for wearable and comfort-focused projects, with a huge colour variety (just remember it won’t patina and you should finish edges by other means).
Oil-tanned leather is your friend for rugged outdoor use – it’s hardy and low maintenance, albeit with a casual look. Synthetic faux leather can substitute where cost or ethics demand, and works for many applications if you accommodate its non-breathability and finite lifespan. And bonded leather is a budget material for light use and decorative purposes, not suitable for long-term wear and tear.
Knowing these types, you can now make informed decisions about which leather to select for your project based on the needed properties (rigidity, softness, water-resistance, appearance). Next, we will delve into specific application areas – footwear, crafting, upholstery, etc. – and discuss how to choose and work with leather in each context, including recommended leather types, techniques, tools, and tips tailored to those uses.
Application-Specific Leatherwork Guide
In this section, we explore four broad application areas: Footwear production, General leather crafting (wallets, belts, etc.), Upholstery (furniture, automotive, medical), and Niche/specialist uses (orthotic leatherwork, sensory tools, artisan hobbies). For each, we will discuss the types of leather most suitable, the techniques involved (and any special considerations), and the tools and materials you’ll likely need. This will give you practical insights into how to approach different leather projects and ensure you get the best results for that specific use case.
Leather in Footwear Production
Crafting footwear is a complex art that uses multiple types of leather in one product – typically, different parts of a shoe or boot call for leathers of different tannages and thicknesses. A classic example: most high-quality shoes use chrome-tanned calfskin for the uppers (for softness and suppleness), but vegetable-tanned leather for the soles, insoles, and other structural components (for strength and shape retention). Below, we break down footwear by component – insoles and linings, uppers, and soles/heels – and then outline general shoemaking techniques and tools.
Insoles and Linings (Footbed and Interior)
- Leather Selection: The insole (footbed) of a shoe – particularly in traditional welted shoes or quality boots – is usually made from thick vegetable-tanned leather, often around 4.5–5.5 mm thick (11–14 oz) . This leather is sometimes called insole shoulder or bend – a very firm, dense veg-tan that resists stretching. It forms the backbone of the shoe underfoot and needs to support the foot without collapsing. Notably, veg-tan insoles will gradually conform to the wearer’s foot shape with wear (one reason leather insoles are prized). They also breathe and absorb moisture, which is great for comfort. For example, high-end dress shoes often use oak-bark tanned cowhide for insoles (J. & F.J. Baker’s insole shoulder is famed for this).
In more casual or modern shoes, insoles might be synthetic or fiberboard with a leather cover, but if you’re handmaking shoes, a full leather insole is traditional. Linings (the interior lining of the shoe upper) are typically a soft, thin leather – often chrome-tanned calf or goat, about 0.5–1.0 mm thick (1–3 oz). However, there’s a strong case for using vegetable-tanned lining leather for insoles and linings because it’s chrome-free and more breathable, reducing the risk of allergies and sweat issues. Many quality makers use veg-tan calf for linings, especially in children’s shoes or orthopaedic footwear, to avoid chrome allergies. In summary: for insoles, use thick veg-tan; for lining, use soft calf/kid (chrome or veg, chrome-free ideally) around 1 mm thick. - Working Techniques: Insole preparation is a critical part of shoe building. If making a welted shoe, you’ll bevel and shape the insole, possibly cut a channel or cement a rib to it for welting. The veg-tan insole may need soaking and moulding to the last – shoemakers often soak the insole leather, tack it onto the bottom of the last, and let it dry so it takes the shape of the last’s contours (arch, toe shape). Once dry, the insole holds that shape (veg-tan memory). You’ll then attach it permanently during lasting. If doing a simpler cemented shoe, you might not mould the insole, but you’d still attach it flat inside.
For linings, the thin leather is skived at edges to avoid bulky seams and is usually glued and then sewn inside the uppers. Pro tip: Chrome-tanned lining leathers are very soft – when skiving edges (like where lining meets insole or at top edge of a shoe), a sharp knife is needed and it’s easy to accidentally slice through. Skive gradually and consider a French skiver tool for consistency. Attaching linings: Often done with adhesive to hold in place, then stitching along margins. Ensure no wrinkles; because lining leather is so soft, it can crease – work it smooth. Also, when lasting (stretching uppers over the last), the lining and upper should move together; some shoemakers lightly glue lining to upper leather to make them act as one layer while lasting, preventing wrinkles inside. - Tools & Materials: Key materials for insoles: thick veg-tan leather, perhaps pre-cut insole blanks. You’ll also need shank material (metal or leather shank to reinforce the arch in many shoes), corks or fillers for the footbed (in welted shoes, cork is added on top of the insole in the forefoot area for cushioning).
For linings: thin calf/goat, plus shoe lining glue (usually a contact cement) to bond lining to upper. Tools include a skiving knife, tacks or nails (cobbler tacks for temporarily holding insoles during moulding or lasting), a lasting plier and hammer (to shape and secure leather over the last), and an awl for piercing and stitching if doing welts. Shoemaking often also uses bevelled knives for cutting channels in insoles and rasps or skiving pliers to trim leather once lasted. A stitching awl and waxed linen thread would be used if sewing insoles by hand (like sewing a welt onto the insole rib). If making removable insoles (like inserts), you’d cut them out and possibly add foam, covering with thin leather – more of an orthotic build process.
Uppers (Shoe/Boot Exteriors)
- Leather Selection: The upper (outer part of the footwear that covers the foot) typically demands a balance of flexibility and strength. Chrome-tanned full-grain calfskin is a gold standard for fine shoes – usually in the range of 1.0–1.5 mm thick (about 3–4 oz). This thickness is enough to be durable but thin enough to shape and flex comfortably. Calf leather has a tight grain and takes polish well for dress shoes. For sturdier boots, cowhide around 1.5–2.5 mm might be used, often chrome-tan or combination tanned (like Chromexcel) for toughness and water-resistance. Suede (which is often a chrome-tanned split or a sueded full-grain) is used for certain styles – though less formal, it’s a valid upper material. For heritage boots (work boots, logging boots), oil-tanned leathers are common – e.g., oil-tanned cowhide 2.0–2.2 mm for boots that need to withstand weather and scuff (brands like Red Wing use this).
If one wanted to use veg-tan for uppers, it’s possible (there are veg-tan boots that age wonderfully), but note that veg-tan uppers will be stiffer and more prone to water staining; they work better in boots and sandals than in delicate shoes. Some makers do use veg-tan horsehide (shell cordovan) for upscale shoes – shell cordovan is a specific dense leather from the horse rump, veg-tanned, prized for luxury shoes. It’s an outlier but worth mentioning as a niche upper material that doesn’t crease easily and shines brilliantly.
In general, for most footwear uppers, look for a soft, flexible leather around 1–2 mm thick, with good tensile strength. Goat and kangaroo leather are also used in speciality footwear (gloves, cleats) because of their strength-to-thickness ratio – kangaroo in particular is very strong for its thinness (commonly in high-end soccer boots). But for standard shoes, chrome-tanned calf or cow is the norm. - Working Techniques: Making uppers involves pattern cutting, skiving, sewing, and forming. Cutting uppers: Use patterns to cut each piece (vamp, quarters, etc.) precisely. For consistency, shoemakers prefer to cut all lefts and rights mirrored. A clicking knife (head knife) or sharp blade is used to navigate curves. Ensure the leather’s grain direction is considered; uppers often have the stretch oriented around the circumference of the foot, not lengthwise (for example, pattern pieces are laid out so that the tightest direction of the leather goes along the length of the shoe to avoid stretching in that direction).
Skiving seams: Many upper pieces are skived at the edges to reduce bulk when overlapped – e.g., the edges of a toe cap or the tongue where it’s stitched to the vamp. Use a skiving knife or French skiver for consistent bevels. Thin chrome-tan skives well with a sharp blade; you’re often just thinning from, say, 1.2 mm to 0.6 mm at the edge for a smooth join. Stitching uppers: This is typically done with a sewing machine (a post-bed or cylinder-bed machine that can handle leather). Seam allowances are usually small (3–5 mm), and since the leather doesn’t fray, you don’t need to fold edges under except for specific design reasons. Use a Teflon foot or roller foot to sew without sticking.
If hand-sewing an upper, you could saddle stitch, but that’s rare except maybe in moccasin constructions or decorative stitches – it’s labour-intensive. If machine stitching, practice on scraps first because once you stitch a visible part of an upper, any needle holes remain permanent even if you remove the thread. Lasting (shaping the upper): Once the upper is sewn together (and the lining attached), it’s time to last it (stretch it over the shoe last). Typically, you’ll moisten the upper leather slightly (especially if it’s leather that responds well to moisture – for chrome, a light mist is enough; for veg, you’d properly soak and case it more heavily).
Then you pull it around the last, starting at the toe and heel, fix it with tacks or clamps, and work out wrinkles by pulling and tacking along the sides. This is where the leather’s quality shows: a good upper leather will stretch and conform without tearing, and then hold shape as it dries. You may use a lasting plier (which grips the leather and has a hammering head to drive tacks) to pull the leather tight over the last. Be mindful of temperature; sometimes warming the leather can help it stretch (some shoemakers heat the leather slightly for lasting, especially with Chromexcel-type leathers). - Drying: Let the last shoe dry thoroughly so the leather “memorises” the shape. Then you remove tacks that were temporary (in a welted shoe, some tacks might be replaced by lasting stitches or by the welt stitching itself).
- Design & Construction: Depending on shoe style, the upper assembly might involve adding stiffeners: e.g., a toe puff and a heel counter. Traditionally, these were leather (often veg-tan splits soaked in toe-puff solution or glue), but modern shoemaking often uses thermoplastic sheets that are heat-activated. If you are doing all-leather construction, you can use veg-tan pieces skived to nothing at the edges for the toe and heel stiffeners, soaked and formed in place, then the upper leather is lasted over them. They provide shape and support to the toe and heel. Another aspect is punching holes or adding hardware (brogue perforations, eyelets for lacing, hooks, etc.) – do this at the flat pattern stage or just after cutting pieces, before assembling the upper, because it’s easier than after it’s lasted. Use leather punches or a broguing punch for decorative holes. Reinforce eyelet areas by either doubling the leather or adding a little veg-tan strip between the lining and the upper. When adding metal eyelets, use an appropriate setter and make sure the leather is not too thick (skive if necessary).
- Tools & Materials: For uppers, aside from leather, you need: shoe last(s) of the right size and style (these are forms that shape the shoe), lasting tacks or nails, lasting pliers, hammers (a French hammer or lasting hammer to drive tacks and flatten lasting margins), and knives and scissors for cutting patterns. A sewing machine for leather is extremely useful (post-bed for closed uppers is ideal), but it can be done by hand with patience. Also, edge bevelers can be used to trim and smooth the lasting margin (excess leather under the shoe) so it doesn’t cause unevenness under the foot. If doing welting: welting awl, welt, thread, pitch (tar) for thread if doing traditional, etc.
If doing cemented: contact cement to attach the upper to the midsole/sole. Also, rasp or sandpaper to roughen surfaces (like roughening the lasted leather bottom before cementing a sole). For finishing uppers after the shoe is done: edge irons or sleeking bone to smooth wrinkles, polish or dye for touching up, etc. Finally, protective gear: while not often listed, when working with tacks, some wear a leather apron or at least be mindful of flying nails; eye protection if using nails is a thought. Good ventilation if using contact cement extensively (the fumes are strong – work in a well-ventilated area).
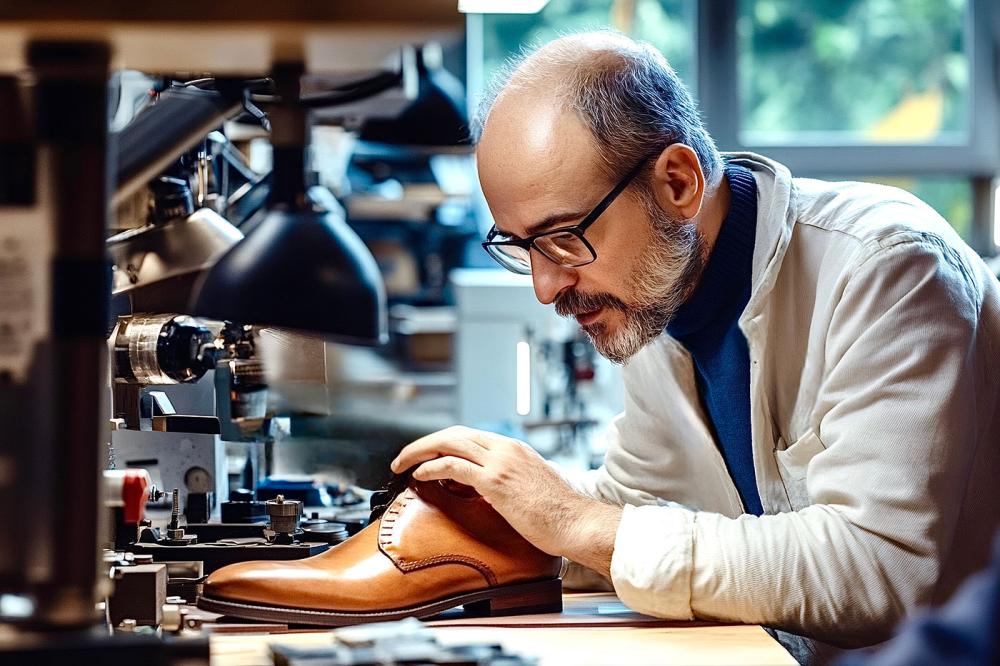
Shoe Leather
Soles and Heels
- Leather Selection: Traditional dress shoe soles are made from thick vegetable-tanned leather bends, typically oak or pit-tanned for hardness. Thickness is usually in the range of 4.5–6 mm (which is ~11–15 oz) for men’s soles. For example, the famous Rendenbach oak-bark soles are around 12 iron (~9 oz), which is about 4mm, and shoemakers might use two layers if they want thicker soles. Leather soles have a classy feel and can be shaped and sanded nicely. However, pure leather outsoles wear quickly than rubber, so sometimes rubber half-soles are added for durability. For boots, you may use a slightly thicker leather midsole plus a rubber tread sole.
For heels, if building a leather stack heel, you use the same veg-tan sole leather in layers called heel lifts. These are cut into heel shape and stacked to perhaps 3–4 layers (depending on desired heel height) and then topped with a top-piece (often rubber for grip, or leather with rubber insert). Heel leather can be a bit less high-quality than the outsole; however, usually one just uses the same bends. For women’s high heels, often plastic or wood heels are covered with leather (the leather in that case is thin chrome leather for covering, not structural).
In summary, firm veg-tan is key for soles and heels – it provides the necessary rigidity and wear resistance. Historically, oak-bark tanned cowhide from the butt (back) of the hide is best (dense fibres). Thickness can be adjusted to taste (thicker for durability, thinner for flexibility). If doing a thinner dress sole, ~3.5–4 mm can suffice, often paired with a thinner split as a midsole. There are also combination soles: e.g. Dainite or rubber soles – but focusing on leatherwork, we’ll assume leather outsoles. - Working Techniques: Attaching soles: If making a traditional welted shoe, after lasting the upper and sewing the welt, you fill the cavity (with cork, etc.) and then attach the outsole either by stitching (for Goodyear or handwelt, stitching through welt, outsole, and insole rib) or by cementing (some do both cement and stitch for security). Stitching soles typically involves cutting a groove or channel in the outsole: e.g., a closed channel where you cut a flap, lift it, cut a stitching groove under it, sew the sole to the welt, then glue the flap back down to hide stitches. This is advanced and requires a good outsole stitching awl or stitching machine.
For a beginner, a simpler cemented attachment is possible: cement the outsole leather onto the bottom (possibly with some nails in the heel area for reinforcement). Shaping soles: Once attached, leather soles are trimmed flush to the welt with a knife, then edged. Use a sharp knife or sole cutter to trim; it’s like trimming pie crust. Then you sand or rasp the edges smooth. Leather sole edges and heel edges are usually bevelled and burnished for a finished look.
You can use an edge beveler to round the sole edge slightly, then apply dye or ink to colour it (often black or dark brown) and burnish with a cloth or burnishing wheel to get it shiny. Many shoemakers apply a mix of waxes and use a heated edge iron to really smooth and gloss the edges – called edge ironing. (The heat melts wax into the edge and gives a crisp line). This is an art in itself. Heels: Building a leather heel stack means cutting layers (heel lifts) that fit the heel shape. You cement and nail each layer as you build up.
Typically, nails (from inside or tiny brass nails from outside) hold the layers while the glue cures. Then you rasp the heel to shape (heels are often shaped with a slight curve – called breast shape on front and back shape). After shaping, you attach the top piece (usually a rubber or combo top lift for traction). That is nailed in (most heels have nails through top piece into the stack). Then edges of the heel are finished similarly to the sole edges (trimmed and burnished). Welt and sole stitching: If doing a welted construction, you first stitch the upper to the insole (through the welt) – that’s welt stitching; then stitch sole to the welt. Hand-welting uses a curved awl to make holes through the insole rib, upper, and welt; then a stitching thread to secure.
Outsole stitching later goes through the welt and outsole only (ideally not through to the insole). The specifics go deep – whole books cover this – but for brevity, ensure you have appropriate tools (welt awl, stitching irons or sewing machine for outsole). If making a simpler shoe like a Blake stitched (where you sew the outsole directly to the insole from inside), you might use a curved needle machine or do it by hand with a short curved awl. Alternatively, cement construction (used in many modern sneakers and boots) just uses strong contact cement to glue soles on – simpler but less traditional. - Finishing: After soles and heels are on, final finishing includes scraping or sanding the sole bottom for smoothness (some makers lightly sand the leather sole and then burnish it with a bone and apply a coat of leather sole finish to make it shiny and a bit water-resistant). Often, you’ll also stamp or mark the sole (with size, maker, etc.). The sole may be scored with slight grooves for traction or aesthetics. Finally, apply an edge dressing (like a sealant) to the edges and polish the shoe overall. Leather soles, before wear, can be a bit slippery, so sometimes a thin rubber piece is glued onto the front for grip (called a half sole or sole protector) – but many leave them leather and let the user decide.
- Tools & Materials: For soles and heels, aside from the leather itself, you’ll need: contact cement (specific neoprene cement for shoe soles is good), hammers (a larger lasting/peg hammer to knock soles and heels to ensure good contact and to clinch nails), knives (a sturdy knife for cutting thick sole leather and trimming – often a hooked “sole knife” is used), rasp or file (for shaping edges and heels), sandpaper or a belt sander (shoemakers often use a sanding machine to finish edges; by hand you can use coarse to fine sandpaper wrapped around a block), edging tools (edge beveler, edge iron if available, or just burnishing cloths), and spirit lamp or heat gun if you plan to heat tools for waxing edges.
If stitching the sole: stitching awl and large needle, thread (usually thick waxed linen or poly – often 4-6 cord), and a way to hold the shoe (a harness, horse or gripping jaws or simply mounting it in a vice padded with leather). You’ll also want nails: typically small cobbler nails or brads (~1/2” length) for temporarily nailing soles and for heels (heel nails can be longer for thick heels, often clinched inside). A pincers for pulling out nails is needed too. For safety, wearing eye protection when nailing isn’t a bad idea – nails can snap or fly if hit wrong. And definitely a respirator or mask when sanding leather (the dust, especially from any old leather with chrome, is not healthy to inhale).
Footwear Safety Note:
When working on shoes, you’ll use sharp tools under force (e.g., stabbing with awls, cutting heavy leather, swinging hammers, using contact cement with fumes). Always cut away from yourself and keep awl tips covered when not in use. Use proper ventilation or respirators with glues and finishes. Keep fingers clear when nailing (a leather holding tool or pliers can hold small nails). Wearing a heavy apron can protect against dropped knives or flying nails. Shoemaking is rewarding but demands respect for the tools and materials.
Summary (Footwear):
In choosing leather for footwear, use veg-tan for insoles/soles (for support and shape) and chrome/oil-tan for uppers (for comfort and suppleness) . For insoles, a quality veg-tan footbed provides breathability and a personalised fit over time. For uppers, chrome-tanned calf or similar gives durability with flexibility – note that nearly all modern shoes rely on chrome-tanned uppers for their blend of strength and comfort.
Working on footwear is advanced, but if you break it into components (prepare insole, stitch upper, last upper, attach sole), it becomes manageable. A mix of handcraft and possibly machine sewing is used. Expect to use a wide array of tools and give yourself time to practice techniques like skiving and welt stitching. Even if you’re not making shoes from scratch, understanding these principles is useful for shoe repair as well – for instance, replacing a leather sole or fixing a heel on a dress shoe requires similar skills and material knowledge.
Next, let’s move from feet to the broader world of general leather crafting – wallets, belts, straps, sheaths – the kinds of projects many leatherworkers tackle.
Leather Crafting: Wallets, Belts, Straps and Sheaths
Leather crafting covers a huge range of handmade items. We’ll focus on a few representative categories – wallets and small goods, belts and straps, and sheaths/holsters – as these demonstrate different demands on leather. We’ll talk about choosing the right leather (type and thickness), the techniques for constructing each item (cutting, stitching, finishing), and the tools particularly useful for them.
Wallets and Small Leather Goods
Leather Selection: Wallets, card holders, and similar small goods often require moderately thin leather so that the finished item isn’t too bulky (remember, a wallet may have multiple layers when folded). Typically, leather around 2–4 oz (0.8–1.6 mm) is used for wallets. Both veg-tanned and chrome-tanned leathers are popular here, each giving a different style. For a structured, classic wallet (that you might stamp or tool), veg-tan leather around 2–3 oz is excellent – it starts firm but will break in and can be burnished on edges nicely. You might use veg-tan for the exterior for durability and tooling possibilities, and perhaps a thinner chrome-tan (or veg-tan split) for interior pockets to reduce bulk.
Conversely, many modern or luxury wallets use chrome-tanned leather (calf, goat, etc.), which is naturally soft: e.g., goatskin lining leather about 1–1.2 mm is common for interiors of high-end billfolds because it’s supple. If the wallet requires flexibility (like a bi-fold that needs to bend easily), a softer leather or a veg-tan that has been thinned in the fold areas is key. Oil-tanned pull-up leathers can give a great rustic look for wallets – they won’t hold tooling, but they’ll look beautifully worn-in with time.
For very minimalist card wallets, some crafters even use heavier leather (5–6 oz) and just do a couple of layers, relying on the leather’s stiffness. But for a multi-slot traditional wallet, staying around 3 oz for each layer is a good balance. Also consider exotic leathers (like alligator, ostrich) are often used as wallet exteriors – these are usually chrome-tanned and come in about 1–1.5 mm thickness, backed with a thin lining for strength. If you venture there, know exotic leathers often require special handling, but that’s beyond our scope. In summary, for wallets: thin, pliable leathers are needed for interiors; the exterior can be a bit thicker if you want sturdiness. A good combo is: 3 oz veg-tan exterior, 2 oz calf interior (veg or chrome). If making a totally veg-tan wallet, you might use 2 oz for interior parts (like Tandy’s wallet interior leather is typically thin veg).
Construction Techniques:
- Pattern & Cutting: Wallet patterns are usually composed of rectangular pieces (for card slots, cash pocket, etc.). It’s crucial to cut very cleanly and accurately, as small misalignments show up in a wallet. Use a ruler and sharp knife for straight lines; for rounded corners, a round punch or a coin as a guide with a knife can help. If you plan on skiving edges (common to reduce overlap bulk at edges of card slots), mark those areas on the flesh side so you remember. Also plan any lining or fabric you might include (some wallet makers line the cash pocket with fabric to reduce friction, etc.).
- Skiving and Thinning: One of the secrets to a professional wallet is thinning leather where multiple layers stack. Common places: the edges of card slot pockets (to avoid a big step when stacked) and the fold line of the wallet (to allow easier bending). You can use a safety skiver to taper the bottom of each card slot piece to almost a zero thickness at its bottom edge. When these are layered, the transitions are smooth. Similarly, often the center fold (spine) of a bi-fold wallet is skived thinner from the inside to help the wallet close nicely. If you have a splitter machine, you might split entire pieces to a uniform thinner gauge (many production wallets split all interior pieces very thin). Without one, hand-skiving edges works well. Just go slow; as always, a sharp blade is needed – dull skiving leads to cuts and gouges.
- Stitching (or Lacing): Most wallets are hand-stitched using saddle stitch or sewn on a machine with fine thread. If hand stitching, use pricking irons or stitching chisels to ensure evenly spaced, straight stitching lines . For instance, on a wallet edge, you might use a 3.0 mm or 3.5 mm spaced chisel (about 8–9 SPI) to get a neat fine stitch. Common thread for hand sewing wallets is waxed poly or tiger thread at perhaps 0.6 mm diameter for a bold look, or linen thread around 432 size for a subtler look. If machine sewing, a thicker needle (~90/14) and upholstery weight thread (like Tex 60) gives a nice stitch, but you can go thinner for luxury wallets. Some designs avoid a lot of stitching by using folds or rivets, but generally wallets involve a fair bit of sewing (each card slot either stitched or at least the sides of the wallet stitched). Ensure your needle/hole sizes are appropriate – too large holes and the stitch looks gappy on such small items.
- Edge Finishing: On wallets, edges are very visible and are handled a lot, so finishing them well elevates the piece. If using veg-tan, edge bevel and burnish the edges. Typically: glue all layers of the edge together (e.g., the wallet outside and lining) then sand or trim so they’re flush. Then use an edge beveler to round them. Then burnish with water/gum tragacanth and a slicker vigorously until shiny and smooth. Apply a bit of beeswax at the end and give a final buff for a nice edge.
If using chrome-tan or mixed materials where burnishing isn’t effective, consider edge painting with a product like Fenice or Giardini edge paint. This can give a very clean, uniform edge (commonly seen on luxury brand wallets). It involves applying multiple thin coats, drying, sanding, etc., but the result can be a smooth glossy edge in any color. For example, many box calf leather wallets have black or matching edge paint rather than a burnished edge. Another approach for some wallets is a turned edge – you skive the edge of leather thin, fold it over and glue it to itself or a lining, hiding the raw edge entirely. This is advanced but yields a very polished look (often used on fine long wallets and clutches). - Folding and Creasing: If making a bi-fold wallet, you’ll eventually fold it in half. Veg-tan will likely need the spine thinned or even a groove scored on the inside to help it fold crisply without cracking. You can use a creaser or groover to mark a line down the centre (on the flesh side) to encourage the fold. Also, some makers wet the spine slightly and then fold, pressing it with a bone folder, to set the crease. Chrome-tan wallets fold easily but may not hold a sharp crease; sometimes a light top-stitch along the fold (or just a decorative crease line with a creasing iron) is added for aesthetics. A creasing tool can also be used to deboss a line parallel to edges on wallet parts for a professional detail.
- Glueing and Assembly: Wallet assembly often uses glue to hold pieces before stitching (e.g., attaching pockets to the backing). Use wax paper or masking techniques when glueing to keep glue only where needed, since stray glue on a nice piece of leather will prevent dye or finish from taking and can be visible. Especially with chrome-tan interiors, be sparing with glue (because if glue seeps, it can darken the thin leather). A common assembly order: glue card pockets onto the interior panel in steps, stitch their edges as needed, then glue the interior panel to the exterior (carefully aligning), then stitch around the perimeter. The glue ensures nothing shifts while stitching and also keeps the layers from gaping over time (for instance, the interior and exterior of a wallet are usually glued flat together and then treated as one piece when stitching edges). After stitching, hit the stitched area with a mallet lightly to seat the stitches into the leather for a flush look.
- Finishing & Care: Once the wallet is built, give the whole thing a once-over: trim any stray threads (and you might singe thread ends carefully if using synthetic thread). If it’s veg-tan and was undyed, you may now dye it – but generally, one dyes before assembly to ensure even coverage. More often, you would have dyed/finished the pieces beforehand. For veg-tan wallets, applying a coat of resolene or wax finish protects it. For chrome-tan, a simple polish or conditioner on the surface will do. Finally, buff all surfaces so it’s clean for use. Over time, advise that the wallet be kept dry and occasionally conditioned; veg-tan ones will darken nicely with handling.
Tools for Wallet Making:
Essential tools include utility or craft knife (or rotary cutter for long straight cuts), ruler, skiving tool, scratch awl (for marking stitch lines or where to cut), wing divider or stitching groover (to mark parallel lines for stitching), pricking irons or stitching chisel, diamond awl if hand stitching (to help clear holes), stitching pony (to hold the wallet while stitching), needles and waxed thread, edge beveler, burnisher (wood or canvas), mallet (to tap seams and stitches flat), contact cement or leather adhesive, small clamps or clips (helpful while glue dries), and fine sandpaper (to smooth edges before finishing). For edge painting: edge paint applicator (like a small roller or just a fine brush) and sandpaper of various grits. A bone folder or press is handy to press down glued pieces and crease folds. If stamping initials or designs, you’d need the stamps and a maul. Most of these tools cross over with other leather projects.
Belts and Straps
Leather Selection: Belts and straps require strength (they often bear load or stress) and usually benefit from a bit of rigidity to prevent stretching. Therefore, full-grain vegetable-tanned leather is the traditional choice for quality belts. A typical belt thickness is about 8–10 oz (3.2–4 mm) for a sturdy belt, which comes from a veg-tan cowhide shoulder or backstrap. This gives a nice, substantial feel and long life. Such leather is often sold specifically as “belt blanks” or “straps” already cut to width.
Veg-tan is ideal because it’s strong, can be stamped or tooled (think of decorative Western belts), and will mould slightly to the wearer but not overly stretch if it’s good quality. It also burnishes nicely on edges and takes dye well. There are also specialized leathers for straps: bridle leather (veg-tan that’s been stuffed with waxes and finished on both sides – very durable and weather-resistant, great for belts, often used in equestrian tack), harness leather (similar to bridle but often a bit less polished finish, for working gear), and latigo (a combination-tan leather, veg re-tan with oils, used for straps that might see weather – common in outdoor gear).
For belts, bridle leather in the 9 oz range is fantastic – it’s supple yet strong and comes in dyed-through colours, meaning you might not need to do much finishing except edging. For fashion belts, sometimes a softer chrome-tan is used but with a supporting filler or multiple layers (this is common in cheaper belts: a top grain layer bonded to a lining and a filler in between). Those don’t last as well. Full-grain one-piece leather belts are superior. For narrower straps (like watch straps, bag straps), you might use lighter-weight leather or multiple layers glued flesh-to-flesh. Watch straps often use 2–4 oz leather plus a liner, and often chrome-tanned or calf for flexibility.
Bag shoulder straps often use 7–8 oz bridle or veg-tan, or two layers of thinner leather stitched together. The key is for any strap that bears weight or tension (belts, bag straps), veg tan or similarly structured leather will resist stretching best. If you do use chrome-tan for a strap, consider reinforcing it by sewing a strip of non-stretch material inside (some makers insert nylon webbing inside a leather strap to give strength if the leather is stretchy).
Construction Techniques:
- Cutting Straps: If you’re cutting from a hide, a strap cutter tool can be used to slice long even strips of a set width from veg-tan leather. This is very handy for belts. Alternatively, you can cut by knife and a straightedge, but maintaining long straight cuts is challenging – a plough gauge or strap cutter pays off for belts. Many veg-tan shoulders come with one straight edge; you measure and cut parallel to that. For belts, cut slightly longer than needed; you’ll trim to fit after attaching the buckle.
- Belt Edges: After cutting, bevel the edges (top and bottom) to remove the sharp corners. Use an edge beveler sized appropriately for the leather thickness. This makes the belt more comfortable and prepares it for burnishing.
- Belt Buckle Attachment: Most belts have one end turned over a buckle and fastened with either stitching, rivets, or Chicago screws. To do this, you’ll skive the buckle end of the leather from the flesh side to about half thickness (so that when folded, it’s not too bulky). Typically, skive an area about 2–3 inches long where it will fold. Punch a hole or slot for the buckle’s prong (if it’s that style of buckle) – use an oval punch for the slot, matching the prong width. Also, punch holes for rivets or mark the stitching line if stitching.
Many belts use a couple of rivets because it’s quick and strong; others use screws (which allow changing the buckle). If using rivets, ensure you have the right length rivets for the thickness (too long and they won’t peen down tight, too short and they won’t set). Riveting: After folding the leather over the buckle bar, align the holes and set the rivets with a rivet setter and anvil. If stitching, punch stitch holes and saddle stitch across the folded strap (you might do two or three rows for a decorative look or just one row). - Hole Punching: On the opposite end of the belt, measure and punch the adjustment holes for the prong. Standard belts often have 5–7 holes spaced 1 inch (25 mm) apart. Use an oval or round punch (oval is traditional as it fits prongs nicely). The holes should be centred along the strap’s width. If you've bevelled and burnished already, you can still punch holes fine; sometimes you’ll burnish after hole punching too to ensure those edges are smooth. Also consider punching a small hole at the very tip of the strap (for aesthetics or if making a tongue slot to tuck the tip, though usually belts just end with a pointed or rounded tip). The belt tip can be cut to shape (straight, rounded, pointed). Use a strap end punch for a perfect shape or cut by hand and sand.
- Burnishing Edges: Belts benefit from a robust edge finish. Burnishing with water/gum and later wax will give a smooth edge that’s comfortable against clothing and skin. As with wallets, sand the edge if needed, then burnish. You can edge dye before or after burnishing, depending on the product (some dye after smoothing). Traditional bridle leather belts often have edges dyed black or dark regardless of belt color, just as a contrast and because it’s easier to match outfit if edge is dark. Use gum tragacanth or even saddle soap to slick the edges, then finish with beeswax. Some belt makers also do a final edge paint or sealant if not burnishing – but burnishing works great on veg and bridle.
- Finishing the Leather: If you started with natural veg-tan, you’ll need to dye or oil it to give it colour and life. Commonly, belts are dyed (using spirit or pro dyes) and then given a finish coat (like a resolene or wax top). Alternatively, one can use oils and let it sun-tan for a natural look that darkens over time. Bridle/harness leather might come already colored and infused – those usually only need a light buffing and maybe a coat of conditioner. After dyeing a veg-tan belt, definitely buff off excess pigment and then apply a finish to prevent rub-off. A 50/50 water/resolene mix applied and allowed to dry will seal it decently. Then a coat of leather balm or wax can give a nice sheen. Conditioning: Since belts flex and get sweat, conditioning them with a quality leather conditioner (like neatsfoot, mink oil, or commercial conditioners) right after making and periodically during use will keep them supple. Veg leather belts can otherwise dry and crack over many years, especially near the buckle holes.
- Optional Lining: Some belts are lined – meaning two thinner pieces are sewn flesh side to flesh side, either to use a softer interior or to sandwich something. For example, a dress belt might have a soft garment leather lining for comfort, or a tooled veg-tan belt might have a lining to cover the tooling’s back and give more thickness. If lining, glue the two straps together thoroughly, then trim edges flush, and stitch around the perimeter for strength. Then do the edging as one thick piece. Lined belts often look more refined (because the inside is also finished leather). But it’s double work and double material. For a heavy-duty belt (like a tool belt or gun belt), often two layers of veg-tan are cemented and stitched – this adds rigidity. In such a case, stitching is functional to keep layers together since glue alone might not hold under extreme stress.
- Strap Hardware: For other straps like bag straps, you’ll incorporate buckles, D-rings, clasps etc. The process is similar: skive where you fold, maybe add loops/keepers, rivet or stitch hardware on. Adjustable bag straps often use a buckle (like a tiny belt) or slides; those require hole punching and sometimes a loop for the tail. Guitar straps might use slits or buttonholes on ends to attach to pegs – you’d cut those carefully and maybe reinforce with stitching around the slit. Always use leather that won’t easily tear at these connection points – thick full-grain is best, or add a rivet near a slit to stop a tear.
Tools for Belts/Straps:
A strap cutter is extremely useful. Also, punches: hole punches (set of round punches for buckle holes) and an oval punch for the tongue hole in belts, and an end punch (round or pointed) for shaping belt tips. Edge beveler and burnisher as before. Skiving knife for buckle ends. Rivet setter or Chicago screw driver if using that hardware.
A belt slot punch if making slots for prongs or Chicago screws. Also, a measuring tape because belts require measuring length (a belt size is measured from the buckle prong to the middle hole, typically). Scratch awl to mark hole positions evenly. Mallet/maul and a cutting/pr punching board, obviously. If sewing lined belts, then a pricking iron or sewing machine will be needed for that long run of stitching.
If doing decorative stamping or carving on the belt, then all the stamping tools, swivel knife, etc., come into play (plus you’ll case the leather and stamp, then let dry before continuing with assembly). Safety-wise, punching holes can produce flying little leather disks – wear eye protection. And always secure the strap when cutting long lengths – use clamps or ask a friend to hold the other end to avoid slips.
Sheaths and Holsters (and other Leather Cases)
Leather Selection: Rigid containers like knife sheaths, gun holsters, axe covers, tool pouches, etc., require thick, firm leather to protect the item and hold shape. Vegetable-tanned leather is overwhelmingly the choice here, because it can be wet-moulded to shape and will harden slightly when it dries (and can even be further hardened by methods like hot wax if needed). Typical thickness for a sheath or holster is 6–9 oz (2.4–3.6 mm), depending on the size of the tool and desired stiffness. For a small pocket-knife sheath, 6–7 oz veg-tan might do; for a large fixed-blade knife sheath or a pistol holster, 8–9 oz is common (or even two layers of 5 oz laminated).
Often makers will use shoulders or bends of veg-tan cowhide. For a holster, you might also use horsehide veg-tan in some cases (it’s a bit denser). Oil-tanned leathers are generally too soft for a tight sheath, but occasionally people use a stiff oil-tan for a more flexible pouch style. However, a loosely fitted sheath is less secure. If you want the sheath to have some give and be quiet (like for stealth, say a hunting knife sheath might be softer to not creak), you could consider Chrome-tan interior with a veg-tan frame, but most are full veg-tan. Another factor: if the item is sharp or heavy, you want full-grain grain robust leather that won’t easily be pierced or torn. Also, veg-tan is less likely to corrode metal of a knife if kept oiled (chrome-tan can sometimes cause corrosion on carbon steel due to chemicals, though this is debated). For medical or speciality sheaths (like orthopaedic braces, etc.), lighter veg or even alum-tanned might be used, but for typical sheaths, 8 oz veg-tan is a safe bet.
Construction Techniques:
- Pattern & Cutting: Making a sheath or holster often begins with creating a paper or posterboard pattern that accounts for the thickness of the item. Usually, you’ll have a front piece and a back piece (sometimes the back piece extends into a belt loop). Some sheaths also include a welt – a strip of leather sandwiched between front and back along the edge, which protects the stitching from the blade and adds thickness to accommodate the blade spine. Mark out the pattern on the leather and cut with a sharp knife. For curves (like the trigger guard area of a holster or a rounded sheath tip), a head knife or curved blade can help. It’s important to cut pieces a tad oversize, because after wet-forming and stitching, you can trim exactly. If including a welt, cut it from the same thickness of leather (or slightly thinner if you just need a spacer).
- Wet Moulding (Shaping): One hallmark of sheath making is wet-forming the leather to the object’s shape. For a knife sheath, you dampen the front piece of leather thoroughly (not sopping, but evenly through). Place the knife (wrapped in plastic wrap to protect it) on the leather, and press/form the leather around the knife, often using fingers or a bone folder to define contours (like the outline of the handle, guard, etc.). Sometimes you might tack the leather or use clamps to hold it around the knife while it dries. Alternatively, for a holster, you might stitch it first, then wet the assembled holster and insert the firearm to mould it in shape (this is common; you carefully work the leather around details like trigger guard, ejection port, etc., using tools to press in). As it dries, it hardens a bit, capturing the shape.
Ensure you evenly wet the entire piece before forming to avoid water stains or uneven shrinkage. Also, be cautious not to over-soak to the “mushy” stage – that can cause the leather to lose integrity and dry too stiff or shrunken. It’s better to gradually wet and case the leather until it’s pliable but not floppy. If multiple parts need moulding (like a clamshell-style holster with two halves), some makers mould each half separately on a dummy gun, then assemble. Many sheaths are one-piece folded designs, moulded by folding the front over the knife and pressing the edges. - Stitching or Riveting: After shaping (or sometimes before complete drying, to ensure tight assembly), the pieces are joined, usually by stitching along the edge. Mark and punch stitching holes through all layers (front, welt, back) – an awl or drill press can be used if very thick. Saddle stitch with heavy thread (e.g., braided polyester or nylon, something like Tex 270 or waxed artificial sinew for a rustic look). Stitch spacing can be around 5 mm (5 SPI) or whatever suits the scale; too fine a stitch on a thick holster looks odd and can weaken the edge by too many holes.
If you prefer, rivets can supplement or replace stitches at stress points (some holsters use rivets near the trigger guard area where tension is high, plus stitching elsewhere). On simpler tool sheaths, sometimes just rivets are used (3–4 rivets down the edge) – quick but not as nuanced as stitching. If using rivets, choose copper rivets for maximum strength (peened over with a washer) or double-cap rivets for ease (less strong but looks clean). Always include a welt when stitching around sharp blades: it’s a strip that goes the full length of the cutting edge between layers. The blade then cuts into that instead of your stitches if pushed. The welt thickness usually equals the blade spine thickness. Glue the welt in place on the front piece before stitching, to keep it aligned. - Edge Finishing and Trimming: Once stitched, the sheath edges likely need trimming and sanding. Use a sharp knife or belt sander to trim the excess leather flush to the stitching line (taking care not to cut the threads). Then sand the edge smooth, especially if a welt is inside – you want the layers (front, welt, back) to appear as one solid edge. After smoothing, bevel and burnish the edges just like belts (often even more vigorously, to kind of seal the seam). If desired, dye the edges or the whole piece accordingly.
- Detailing: Many sheaths have a belt loop or a way to attach to a belt. A common method: extend the back piece up, fold it and stitch/rivet it to form a loop. If doing this, skive the fold so it’s easier, and maybe stitch a few lines for reinforcement. Use rivets at the top of the loop for extra security (that area bears weight). Some sheaths incorporate a retention strap (like a strap with a snap that goes over a knife handle or gun hammer). If so, that strap is often a separate piece of thinner veg-tan, sewn or riveted to the sheath, with a snap installed. Use line 24/20 snaps or an appropriate size; always put the male snap part on the movable strap (so that if the snap ever snags and pops open, the male part won’t scratch the item). You might need to wet-mould the strap as well around the handle to get the positioning right. Also consider edges of straps – bevel and finish them for comfort.
- Hardening (if needed): Some applications require a very stiff sheath or holster. Techniques exist like cuir bouilli (boiling leather) or wax hardening. For instance, after shaping, one might dip the sheath in melted beeswax or paraffin briefly, then wipe off excess and let cool – the leather becomes much stiffer and water-resistant (common in some historical sheaths and some gun holsters; it gives a dark, somewhat greasy finish though). Alternatively, baking the wet holster briefly in a low oven will harden it (but can also cause shrinkage). These are advanced finishing techniques to experiment with caution. Most of the time, normal air-dried veg-tan provides sufficient stiffness without these measures.
- Finishing & Edges: For sheaths, you’ll want to finish the surface with something to resist water and grime. A coat of oil (neatsfoot) followed by a sealant or wax is good. Some like neatsfoot oil then Sno-Seal (beeswax-based) to make it quite water-resistant. Others use acrylic resin for a more glossy finish. Colouring the sheath can be done with dye before assembly or after (but better before to get even coverage, especially if moulding after dyeing – because moulding after dye can cause stretch marks where colour lightens, some prefer to dye after moulding to cover that). However, dyeing after assembly requires care not to dye the stitching too (unless you want it dyed). Many sheaths are just left natural and oiled, darkening over time.
- Interior: If concerned about the interior (for example, to prevent metal corrosion or scratching), some line holsters with thin suede or smooth pigskin. That’s a whole extra step: you glue a lining inside before stitching, treating it as another layer. It can make drawing the weapon smoother or avoid bluing wear. But for most knife sheaths, leather insides are fine – just keep it clean and occasionally wax inside to keep moisture out.
Tools for Sheath/Holster Making:
Many already covered: knives, hole punches (you might need drive punches for rivet holes or belt loop attachment holes), stitching chisels or awl, mallet, edge beveler, burnisher, skiving tool, contact cement, and clamps. Additionally, spring clips or a stitching pony to hold while sewing. Bone folder or rounded tool for moulding details. If using rivets: rivet setter and anvil; for snaps: snap setter. Possibly drill and a small drill bit if you choose to drill stitching holes in very thick holsters (some do that for uniformity). For sanding edges: A Dremel tool with a sanding drum can speed up smoothing the edges and even help with boning lines in holsters. And safety gear: mask when sanding (vegetable tan dust is still not great to inhale), and as always, be careful with sharp tools when cutting out shapes. If you submerge leather in hot water or wax, have proper tongs or gloves.
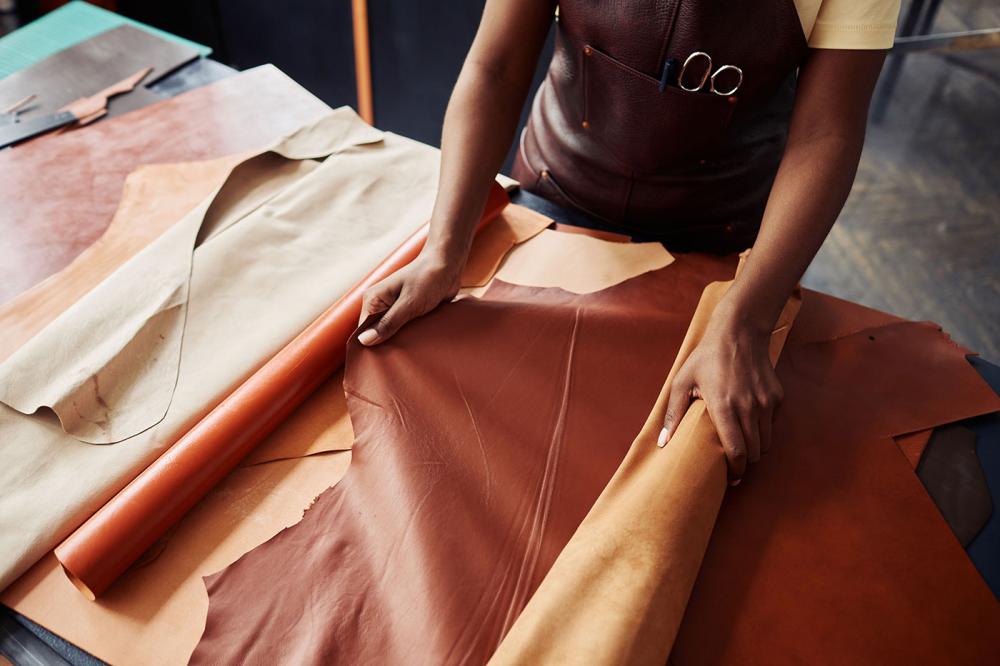
Working With Leather Sheets
Upholstery Leatherwork (Furniture, Automotive, Medical)
Upholstery involves covering furniture or vehicle interiors with leather. It’s a different branch of leatherwork that often requires larger hides, stitching long seams (usually by machine), and balancing durability with aesthetics. We’ll break this into Furniture Upholstery, Automotive Upholstery, and make notes on Rehab/Medical upholstery considerations.
Furniture Upholstery (and General Upholstery Techniques)
Leather Selection: Upholstery leather is usually chrome-tanned cowhide, specifically tanned and finished for furniture use. Key characteristics: it’s sold in large hides (whole hides 50+ sq ft, to cover big panels without seams), it’s softer and more pliable than strap leather, and often has a protective finish (pigmented or semi-aniline) to resist staining. Thickness is typically around 1.0–1.2 mm (about 2.5–3 oz), sometimes up to 1.5 mm for heavy-duty. This weight is a compromise between durability and sewability. Thinner leathers (like garment weight) wouldn’t hold up to abrasion on furniture, while much thicker ones would be hard to stretch and staple around frames.
Common upholstery leathers are top-grain but may be corrected-grain (surface slightly buffed and embossed) with a pigment coating, because furniture often demands uniform colour and easy maintenance. Fully aniline (natural finish) leathers are used too, especially in high-end furniture, but they require more care (they show scratches and stains but are prized for their look). So you might choose a pigmented semi-aniline leather for a sofa that needs to resist spills, or a soft full-aniline leather for a luxury chair where appearance trumps heavy use.
Many automotive leathers are similar in thickness but have even more coating to resist UV and wear. For furniture, you rarely use veg-tan except in decorative patches – chrome-tan’s softness is needed. If doing a retro project like a mid-century chair, you might use a specific variety like Italian corrected-grain upholstery sides or pull-up leather for a distressed look. Keep in mind: upholstery leather often comes in half-hides or whole, not small pieces; it’s also often sold by the hide rather than by the square foot to ensure matching lots. If working on a project, get extra for test and mistakes. For medical or rehab chairs, often vinyl (faux leather) is used for ease of cleaning, but if leather is desired, a coated leather or waterproofed leather might be chosen.
Construction Techniques:
Upholstering with leather involves a lot of sewing and stretching: sewing pieces into cushion covers or slipcovers, and stretching leather over frames and padding.
- Patterning: If reupholstering, you often deconstruct the old cover and use it as a pattern. Leather upholstery pieces typically include some sort of seam allowance (say 1/2”). Mark pieces on the leather’s back with chalk or pencil; try to minimise seams on visible areas for aesthetics and strength. Plan which edges will be folded and stapled vs sewn. For instance, on a chair seat, you might sew the corner seams then stretch the whole piece over and staple under the seat. Leather can stretch, so patterns might be slightly smaller than the area to ensure a tight fit once stretched (commonly 3-5% smaller, depending on elasticity). If it’s a loose cover (like a removable cushion), pattern true to size plus seam allowance, then maybe add some foam or batting to puff it out.
- Cutting & Sewing: Use heavy-duty scissors or a rotary cutter for long straight cuts (leather for upholstery often cuts like thick fabric). On large hides, plan your cut layout to avoid flaws in prime areas. A walking-foot industrial sewing machine is the workhorse for upholstery leather. Use thick polyester thread (e.g. V69, V92) for strength. Stitch length moderate (about 5 mm) to avoid perforation lines. For most seams, a simple butt seam with the allowance folded to one side is fine (like a typical fabric seam). In high-stress seams, you might do a double-stitch: topstitch the seam allowance down for reinforcement (common in auto upholstery as decorative double-stitched seams).
If the leather is very thick or the seam too bulky, skive the seam allowances to half thickness after cutting, so when folded, they’re not lumpy. This is often done on edges that will be wrapped or where multiple layers overlap (like around pleats or piping). Leather doesn’t fray, so you don’t need to hem edges that are hidden, but any exposed edges in upholstery (rare) could be folded or bound. - Stretching & Stapling: For fixed upholstery (like on a wood frame chair or a booth seat), you attach leather by stretching and stapling to the frame. Leather can be stretched moderately taut – it will give a little over time, but you want a smooth appearance with no sag. Use a staple gun (pneumatic is best for hardwood frames). Typically, attach the centre of each side first, then work towards the corners, pulling firmly and evenly.
Avoid over-stretching to where you distort grain or tear at staples. One challenge: leather is thicker than fabric, so at corners, you must neatly fold it to avoid too much bulk. It’s like hospital corners on a bed – you might trim excess on the inside to reduce bulk, then fold and staple. Ensure padding (foam) edges are covered evenly and leather isn’t pulled so tight that it compresses the padding unevenly. If large flat panels (like the back of a cushion) need to be perfectly smooth, sometimes people use a slight adhesive spray to keep leather from wrinkling when stretched, but mostly tension and stapling suffice. - Piping and Details: Many upholstered pieces have piping (welting) along seams – a cord wrapped in leather and sewn in the seam. You can make this by cutting strips of leather (maybe 1.25” wide for 5/32” cord) and sewing around a piping cord with a zipper foot or piping foot on the machine. Then, during assembly, you sandwich this piping in the seam between panels. Leather piping is thicker than fabric piping, but gives a professional touch on cushions. You may want to skive the piping seam allowance to ease sewing. Other details: tufting (buttons pulled in) – leather can tuft, but you must put small holes for the needle and secure with sturdy twine. It looks luxurious (like Chesterfield sofas). If doing tufting, pick a leather that’s not too thick so it gathers nicely; softer aniline leathers tuft better than stiff ones.
- Finishing & Care: Once upholstered, leather furniture doesn’t get “finished” in the craft sense; it’s already finished leather. But you might condition it to ensure it’s supple (test on a scrap to avoid altering colour). Use a leather conditioner or cream that’s appropriate (some have protective agents). Maintaining regular dusting and conditioning every few months keeps it from drying. Keep furniture leather out of direct sunlight to avoid fading/cracking. If working a new piece, after all stretching and stapling, trim off excess leather on the underside to tidy it. Often, a dust cover fabric is then stapled to hide all workings underneath.
Tools for Furniture Upholstery:
Heavy-duty sewing machine (walking foot), staple gun, upholstery staple remover (if you need to pull staples), shears, skiving knife or tool, piping cord, rubber mallet (to bang in tough staples or tack strips), upholstery tacks if traditional method in places, plyers for stretching (some use pig’s foot or webbing stretchers for fabric, but with leather usually hand pulling is enough; sometimes special vice grip-like stretchers exist). A heat gun can be handy to gently warm leather to make it more pliable when stretching around tight curves, but be careful not to scorch or shrink it.
Also, chalk or silver pencil for marking cut lines on the back. Pattern paper or old covers for making patterns. If doing tufting: long upholstery needle and button cover kit (to make leather-covered buttons from scraps). Safety: wear gloves or finger cots if pulling hard on leather to save from blisters; eye protection when using a staple gun or removing staples (they can fly out). The sewing machine is powerful – keep fingers well clear of the needle.
Automotive Upholstery
Leather Selection:
Automotive leather is similar to furniture leather but often slightly thinner (around 1 mm) and with a robust finish that resists UV and dirt. Many car leathers are chrome-tanned top-grain hides with pigment and a clear protective coat. They are often called automotive hides. A unique aspect is they are often perforated (tiny holes) in certain areas (like seat inserts) for breathability or aesthetics.
If doing a car interior, you’d source automotive-grade hides to ensure colourfastness and durability. These hides come in large sizes to cover big seat pieces. One might also incorporate vinyl matching leather in unseen sides, etc., but if doing full leather, stick to one batch for colour match.
Leather in cars is usually tightly pulled and glued in some places as well as sewn, so it has to be strong but workable. Synthetic (chrome-free) tanning is sometimes used for car leather to avoid chrome in the interior environment. But in general, treat it like furniture leather selection: soft, durable, pigment-finished cowhide.
Construction Techniques:
Car seat covers are sewn as fairly complex multi-panel covers that are then hog-ringed or clipped to the seat frame/foam. They involve double-stitched seams (for both strength and a signature look) and often foam backing on certain panels to give shape (like pleated or puffed sections). The steps include:
- Making patterns (often from old covers or measuring the foam directly).
- Cutting panels (taking care to orient any grain or natural stretch consistently – often you want stretch horizontally across seats for comfort but not vertically).
- Possibly laminating a thin foam (like 1/4” scrim foam) to certain panels for padding – you can glue foam to leather and then sew, or use pre-laminated auto leather.
- Sewing panels with French seams or topstitching: For example, a typical car seat seam: sew right-sides together, then open seam and topstitch down both sides (through seam allowances) to create two rows of stitching that secure the seam – this looks nice and prevents leather from bulging.
- Including perforated sections: often done by ordering perforated leather or having a shop perforate it, and these pieces are usually centred in the seat for breathability.
- Adding listing pockets or attachment flaps: car covers often have fabric or leather tabs sewn on that hog rings attach to under the seat (for tension).
- Once a cover is sewn, it’s stretched onto the foam cushion. Hog rings (thick metal C rings) and hog ring pliers attach listing wires in the cover to the seat springs or rods embedded in foam, to hold contours (like the channels you see on seats).
- Edges of the cover are pulled and clipped or bolted to the frame or under the seat pan.
- A heat gun might be used to remove wrinkles at the end (by gently warming and massaging leather).
- Ensuring airbag compatibility: modern car seats have side airbags that deploy through the seam. There are specific ways to sew those seams (with special breakable thread or leaving the seam un-topstitched). If doing a car seat with side airbags, be very cautious and follow guidelines (or have pros handle that part), as altering it incorrectly could impede the airbag.
Tools for Auto Upholstery:
Similar to furniture, a sewing machine (walking foot) for sure – many car seams are long and through multiple layers (leather+foam). Hog ring pliers and hog rings, heat gun, scrim foam (material), contact adhesive (to glue foam to leather, often spray adhesive like 3M 90 is used), sharp scissors for notch cuts, seam ripper (for patterning from old covers). Measuring tape and yardstick for large patterns. Possibly upholstery clip pliers for specialised car clip fasteners. Safety: similar to furniture, plus mind the heat gun. If working inside a car, turn on the ventilation and disconnect the car battery if messing with the seats (airbags).
Rehab/Medical Leatherwork (Orthopaedic Upholstery)
This covers things like custom wheelchair seats, prosthetic socket covers, orthotic braces (like leather ankle-foot braces or spinal supports), therapy swings, etc. These often need high durability and easy cleaning, sometimes hypoallergenic materials. Historically, vegetable-tan leather was used for orthopaedic braces because it could be moulded to body shapes and is skin-friendly if properly finished. For instance, leather ankle-foot orthoses (AFOs) like the Arizona brace have a leather outer and inner with a plastic middle layer.
They typically use thick leather (8–10 oz) for the outer and a softer leather for lining, all veg-tanned to avoid chrome allergies. These are sewn and glued around a custom last of the patient’s foot. Similarly, custom wheelchair seats might have leather panels, but nowadays are often synthetic for easier disinfection. If using leather, something like automotive leather or coated leather might be chosen for wipeability.
Construction/Techniques:
For orthotic braces, you make a plaster mould of the limb, form plastic if needed, then wet-form veg leather around it (or sometimes attach leather after plastic is made). Sew pieces together, often with padding in between. For example, a moulded leather corset for a back brace: soak heavy veg leather, mould to torso shape, nail to a form until dry, then cut and sew straps, add laces or buckles. Safety padding (like foam or felt) is glued inside for comfort.
Many medical leather projects rely on rivets and laces rather than intricate stitching for adjustability. Hygiene is crucial: edges might be sealed to avoid absorbing sweat, leather may be dyed with non-toxic dyes or left natural, and a sealant like wax or resin could be applied to make it sweat-resistant. In therapy equipment, like sensory swings or straps, leather might be chosen for its strong yet soft nature. Sewn with heavy thread and may be doubled if supporting weight.
Tools/Materials:
Most already mentioned: moulding forms, heavy leather, sewing/riveting tools, etc. Possibly grommet setters (for lacing holes in braces). For prosthetics, copper rivets and buckles are widely used. Also, edge padding materials like neoprene or shearling may be used in conjunction.
Safety & Sourcing Considerations (Upholstery & Medical): Always consider flame resistance (auto and public furniture leathers often are treated to be flame-retardant). If you cut or sand chrome-tan (for example, trimming a seat cover), wear a mask so you don’t inhale chrome-laden dust. Sourcing hides for upholstery: buy all you need in one lot to avoid colour/shade mismatches. For medical, ensure leather is chrome-free if it will be long-term on skin (reduces allergy risk). Sustainability: repurpose leather from old furniture if possible for small projects; leather scraps from auto factories can be reused creatively.
Niche and Specialist Leatherwork
Finally, let’s address some niche applications: Orthotic and prosthetic leatherwork, Sensory and therapeutic tools, and Hobbyist/artisan projects. These areas show just how diverse leather use can be.
Orthotic and Prosthetic Leatherwork
We touched on orthotic braces in the upholstery section, but to reiterate and add: Leather has long been used in custom orthotics – think of the classic leather orthopaedic shoe inserts, leather corsets for back support, or the leather cuffs on leg braces. Even with modern plastics, leather remains relevant for comfort linings, straps, and aesthetic covers.
- Leather Selection: As mentioned, vegetable-tanned leather is preferred for anything in prolonged contact with skin, due to lower allergy risk. For supportive parts (like a leg brace, calf lacer or a moulded shoe insert), you want thick veg leather (8+ oz) so it holds shape. For straps and cuffs, veg or alum-tanned leather around 5–7 oz that is flexible enough to wrap but strong. Lining materials could be sheepskin (for softness, historically used in orthopaedic slippers) or chrome-free calf for a smooth feel.
- Techniques: Most orthotic leatherwork involves moulding and forming leather to a plaster cast of the body part. Example: to make a custom leather insole, a foot last is used, veg-tan leather is wetted and pressed into shape (sometimes multiple layers glued together for thickness), then dried and trimmed. It will maintain the foot contours. For braces, often a plastic insert is covered with leather. They might drape a wet leather over the plastic, then stitch or cement it in place, turning edges neatly.
All holes for laces or buckles are reinforced with grommets or washers to prevent tear-out. Stitching heavy brace leather may require a harness sewing machine or hand-stitching with awl and two needles (saddle stitch). Straps usually have buckle and loop closures – solid brass or stainless buckles to avoid rust, sometimes with quick-release hooks. Edges of leather are usually rolled or padded if against skin, e.g., a brace’s top edge might have a rolled seam to be gentle. Leather’s breathability is useful – it can reduce sweat issues compared to all-plastic. But the leather might be perforated or combined with wicking lining to further help. - Tools & Materials: In addition to normal leather tools: plaster casting of patient’s limb, nails/clamps to hold leather on cast, oven or heat gun to accelerate drying if needed (carefully), skiving tool to bevel edges that will be sewn (reduces ridges that might irritate skin), soft padding (felt, foam) to glue inside in pressure areas.
Copper rivets for buckles (copper and brass are used because they’re strong and don’t break like cheap rivets might under stress). Hole punches and grommet setters for lace holes. Possibly dye to make the brace more appealing (some braces are left natural or dyed a skin tone). Historically, some braces were lacquered – leather painted with shellac to seal (makes it less breathable though). A modern approach might use a waterproofing spray to protect from sweat.
Sensory and Therapeutic Tools
Leather can be found in sensory integration therapy tools or fidget toys due to its unique sensory qualities (smell, texture, weight). Examples: fidget keychains braided from leather, tactile mats with leather patches, weighted leather balls or “sandbags” for grounding pressure, or chewable leather items (though chewing on leather isn’t common due to hygiene, some autistic chewelry historically was leather). The smell of leather is also used in aromatherapy – pieces of leather might be included in a sensory box for scent and touch.
- Leather Selection: Typically, soft chrome-tanned leathers are used if the goal is a pleasant tactile feel (like a piece of shearling or suede for a child to touch as a calming object). For weighted items, thick scrap leather can be filled with sand or beads (like making bean bags with leather covers, because leather is strong and has a nice hand feel). If something might be mouthed, vegetable-tan might be safer (less chemicals). Also, non-dyed leather would avoid any dye ingestion – natural veg-tan or naturally pigmented chrome-free, perhaps.
- Techniques: Many sensory leather tools are straightforward crafts: for example, cut shapes (a small leather “worry stone” oval) to rub; or sew small leather pouches filled with beans for a weighted pad. It could also be leather fringe or strips on a sensory blanket for tactile play. The key is to ensure everything is secure – stitching should be tight so kids can’t tear it and swallow the filling. Edges should be smoothed (you don’t want sharp corners). Some might purposely include different textures – like one patch suede side out (fuzzy) and another smooth grain, to offer contrast. Leather braids can serve as a fidget that can be bent and twisted.
- Tools & Materials: Basic sewing if making pouches, or just cutting for making simple shapes. Leather lacing and braiding tools if making a braided fidget or tactile lanyard (maybe a 4-strand round braid). Possibly stamping letters or shapes into leather tags as sensory labels (some kids like tracing letters on leather because of the feel). Honestly, creativity is the limit here, not specialised tools beyond normal leather tools.
- Safety: Ensure no small leather pieces that can be choking hazards for young kids. Use vegetable-based leather if there’s a concern of them putting in their mouth (and obviously discourage mouthing). Leather is generally safe to handle, but any chemical finishing should be avoided – e.g., don’t use a leather with a lot of chromium VI or a finish that could flake into a child’s mouth.
Hobby and Artisan Uses
This category includes creative and artistic endeavours: leather carving art, leather masks and cosplay armour, leather bookbinding, leather jewellery, etc.
- Leather Carving and Art: This uses vegetable-tanned tooling leather, typically 4–8 oz, depending on the project. For pictures or wall art, often 4–6 oz is good. One carves and stamps designs into cased leather (moistening to carve) and maybe paints or dyes it. This requires the classic tools: swivel knife, stamping tools, mallet, and granite slab.
After carving, the piece is usually shaped or just framed. If making a mask, veg-tan around 5 oz is cut to shape, carved or moulded with features, then wet-formed into a mask shape (often using a mannequin face or one’s own face covered in foil – you carefully press and hold until it somewhat retains shape, then stuff with paper and let dry fully). Veg leather masks hold shape well and can be dyed and sealed (often finished with acrylic paint or satin finish). Leather armour (for cosplay or Renfaire) is similar but thicker leather (8–10 oz) and often hardened (boiled or waxed) for rigidity, then strapped together with rivets. - Leather Bookbinding: Bookbinding leather is usually chrome-tanned goatskin or calf in the 1–2 oz (0.4–0.8 mm) range – very thin and pliable to wrap around book covers. Goat is popular due to its durability and nice grain. Techniques involve paring (skiving) edges very thin so they don’t bulk, then glueing leather to book boards with PVA glue. It’s a fine craft needing special skiving knives, paring stones, and maybe a spokeshave. Edges are often turned in and hammered flat. It’s a whole art on its own.
- Leather Jewellery and Braiding: Leather wristbands, earrings, etc. For earrings, often thin, colourful chrome leather is used because it’s light. For wrist cuffs, veg-tan or bridle for firmness, with snaps. Braided leather bracelets or lanyards use lace cutters to make thin straps and then braiding techniques (e.g., a 4-braid round). Tools include leather lace beveler, a fid (for pulling ends through), etc.
- Pyrography: Leather (veg-tan) can be burned with a woodburning pen to create art. Do this in ventilation and note that chrome-tan is toxic to burn, so only use veg. The results are lovely – the heat creates dark marks. After burning, you might just seal it with wax. People make things like bookmarks or coasters with pyrography.
Tools Recap for Hobby/Artisan:
- Carving: swivel knife, stamping set, bevelers, backgrounders, etc., and a sturdy mallet and stone.
- Mask making: face form or mould, lots of patience to hand-shape, maybe leather stretchers or clips to hold edges while drying.
- Armour: hole punches for lacing/riveting, heavy shears for thick leather, edge beveler for comfort, and ideally a partner to help mold large pieces.
- Bookbinding: skiving knives (often English paring knife), paring machine or jig for consistency, paste brushes for glue, bone folder, book press.
- Braiding: lace cutter, beveler, fid, maybe a bevel gauge to keep lace width even.
- Jewellery: hole punch, rivet or snap setter (for closures), small edge beveler if finishing edges on veg-tan pieces.
- Pyrography: just a pyrography pen and tips, and again a respirator or fume extractor – burning leather (even veg) yields smoke you shouldn’t inhale.
Safety:
- For carving: be careful with a sharp swivel knife (cut away from supporting hand). Also, stamping can be loud – wear ear protection if doing it for long periods or if neighboursare around.
- Mask/armour: making often involves hot water or wax – wax is flammable, do it outside or with fire precautions, and hot water can scald – use tongs.
- Pyrography: ensure no chromium in leather and have ventilation to avoid inhaling leather smoke.
- Bookbinding: watch out with super sharp paring knives (the blades are like razors); finger guards are used by many binders.
- Jewellery: not much beyond usual – maybe avoid cheap metal findings that can cause allergic reactions; prefer nickel-free snaps or sterling hooks for earrings.
Tools and Materials Summary
Throughout this guide, we’ve mentioned a wide array of leatherworking tools. Here’s a brief consolidated list of key tools and materials by category of work for quick reference:
- General Leatherwork Tools: Cutting tools (utility knife, leather shears, round/head knife), self-healing cutting mat, straightedge ruler, wing divider (for marking lines), scratch awl (for marking or initial holes), punches (round punches, oblong punch, slot punches as needed), stitching chisels (pricking irons), diamond awl (for hand stitching), needles (blunt harness needles for hand sewing), stitching pony or clam, various pliers (flat nose for pulling needles, etc.), mallets/mauls (poly or rawhide for hitting punches and stamps), edge bevelers (several sizes for different thicknesses) , bevelers and slickers (for edges), skiving knife or safety skiver, cutting pliers (for trimming hardware like rivets), and a good sharpening setup (leatherwork requires sharp tools, so strop and sharpening stones).
- Stitching and Sewing: Waxed thread (poly or linen), pricking wheel or stitching spacer for marking stitches, stitching groover (to recess stitches in veg-tan) , beeswax (to wax thread or condition awl), thimble or finger protectors for pushing needles, possibly a sewing machine (for upholstery or if doing lots of projects – choose industrial walking-foot or heavy duty domestic for lighter work), and machine needles/thread appropriate to project. Also, small pliers to pull needles through tough leather, and lighter for singeing synthetic thread ends (careful!).
- Hardware and Setting Tools: Rivets (rapid/double-cap, or copper rivets with burrs) plus rivet setter and anvil, snaps plus snap setter, eyelets/grommets plus setter, Chicago screws, buckles (various sizes/materials), D-rings, Sam Browne studs, etc., and the little specialised setters for any uncommon hardware. A rotary punch (hand punch with multiple sizes) is handy for quick holes (though for thick leather, drive punches are better). For decorative, maybe spots or conchos and their appropriate tools.
- Moulding/Forming: Moulding forms (could be as simple as wooden dowels for making belt curves or full casts for braces), tacks or clamps to hold leather while drying, a water container and sponge/spray for casing leather, a thermometer if doing water temp specific hardening, and possibly wax and a container if doing wax hardening. Also, an oven or heat gun for controlled heating (low temp usage).
- Finishing and Care: Dyes (spirit or water based) with wool daubers or brushes for application, finish products (acrylic resolene, lacquer, waxes, etc.) and soft cloths for application, burnishing agents (gum tragacanth, tokonole, or just water), edge paint and applicators if using (plus sandpaper to smooth between coats), buffing cloths or a motorized burnisher, leather conditioner (Neatsfoot oil, mink oil, or commercial conditioner) for final conditioning. If doing high-gloss edges or surfaces, a slicker or edge iron may be heated. For suede, a suede brush and protector spray, if needed.
- Safety Gear: Cutting-resistant gloves or thumb guard (especially when skiving or carving towards yourself), eye protection (when hammering or using machine tools), dust mask or respirator (when sanding, dyeing, or burning leather), good ventilation or fume extractor (for glue fumes, dye fumes, burning), apron (a thick apron saves your clothes and also protects if a knife slips), and first aid kit (with bandaids – small cuts are common for beginners).
Safety, Sustainability, and Sourcing Considerations
Working with leather safely and ethically is just as important as mastering technique. In this closing section, we’ll highlight some key points on safety in the workshop, the environmental and sustainability aspects of leather, and tips for sourcing leather responsibly and cost-effectively.
Safety in Leatherworking
Leatherworking is generally safe, but it involves sharp tools, chemicals, and sometimes heavy labour. Here are safety best practices:
- Knife Safety: Always cut away from your body and fingers. Use a proper cutting surface (never on your lap or an expensive table) . Keep blades sharp – a dull blade is more likely to slip and cause accidents. Use a ruler with a finger guard for straight cuts. When skiving or paring, keep your hands behind the blade’s path; some people wear a steel mesh or Kevlar glove on the off-hand for protection. Retract or sheath knives when not in use.
- Punching and Hammering: Wear eye protection when using punches, rivet setters, or anytime metal strikes metal. Tiny bits of metal or leather can shoot off (for example, a snapped rivet cap or a chip from a punch) at high speed. Ensure your tools are in good condition (a mushroomed punch head can splinter when struck). Keep others (and pets) at a safe distance when swinging mallets. Use a stable surface or anvil for pounding to avoid glancing blows.
- Sewing Machines: When using industrial sewing machines for leather, treat them with respect – they are powerful. Keep fingers well clear of the needle; use a guide or tool to hold small pieces near the needle instead of fingers. Turn off or unplug the machine when threading or when not actively sewing. Leather needles are thick and can break and fly – again, eye protection is wise. If you’re guiding long pieces, make sure they won’t snag on anything, which could yank your hand into the needle.
- Adhesives and Finishes: Many leather glues (like contact cement) and finishes have strong fumes that can be hazardous in unventilated spaces. Always work in a well-ventilated area – open windows, use fans or, ideally, a fume extractor. A respirator with organic vapour cartridges is highly recommended when using contact cements, solvent-based dyes, or finishes for extended periods. These fumes can cause dizziness, headaches, or long-term health effects. Also, keep flammable chemicals away from open flames – contact cement and alcohol dyes are flammable until they dry. Use gloves (nitrile gloves are good) when handling dyes, stains, and finishes to avoid skin contact (many contain solvents that can be absorbed, and they will also stain your skin). If you do get chemicals on you, wash with soap and water promptly.
- Heat Tools: If you use a heat gun or flame (for edge sealing or hot creasing, or burning leather edges), be cautious of ignition. Leather will burn (and chrome-tanned leather releases toxic chromium fumes if ignited), so moderate the heat and never leave a heat tool unattended. Keep a fire extinguisher in the workshop just in case. Also, heated creasers or branding irons should be handled with protective gloves and kept on a heat-proof stand when not in use to avoid burns or fires.
- Ergonomics: Leatherwork can be hand-intensive. Take breaks to avoid repetitive strain injuries. If you’re hand stitching for hours, give your hands and shoulders a rest periodically and stretch. Use a stitching pony or clamp to hold work so you’re not contorting your posture. When cutting or skiving, stand or sit in a position where you have good leverage and are not likely to slip. A rubber pad under your piece can reduce slippage.
- Dust and Particulates: When sanding or grinding leather, especially chrome-tanned leather, wear at least a dust mask if not a proper particulate respirator. Leather fibres and any finish particles aren’t good to inhale. Chrome dust from sanding is particularly harmful. Clean up dust with a vacuum that has a good filter rather than just sweeping (to avoid kicking it back up into the air). If you do a lot of edge sanding, consider a small dust-extraction system.
- Allergies: Be aware that some people have chromium allergies – handling chrome-tanned leather or the dust might cause skin reactions. If you notice rash or irritation, use gloves when handling those leathers. Vegetable-tanned leather is generally hypoallergenic, which is why it’s used for watch straps and such on skin for sensitive folks.
- Proper Tool Use and Storage: Use the right tool for the job – e.g., don’t try to punch through very thick leather with a light craft punch (it could shatter), use a heavy-duty punch or drill. Store tools properly: knives sheathed, punches in a block, so that you (or children) don’t accidentally get cut or hit by them. Keep your workspace tidy – an errant awl rolling off the table could stab you (some awls come with caps – use them).
- First Aid: Have at least basic first aid accessible. For cuts, you’ll want clean water, antiseptic, and bandages at a minimum. For more serious cuts, have gauze and a pressure bandage to stop bleeding and seek medical attention. Know that super glue can close minor cuts in a pinch (some leatherworkers jokingly call it “stitcher’s friend”). But obviously, avoid getting to that point by working safely to begin with.
In summary: stay aware. Most accidents happen when we’re tired or rushing. Leatherwork is often about patience and precision – cultivate that calm mindset and it doubles as safety practice. If you’re teaching a younger person leatherwork, emphasise these safety habits early on. And if you are unsure about a process (like using a new chemical or tool), research it – as we did here – to understand any hazards.
Sustainability and Environmental Impact
Leather’s sustainability is a complex topic. On one hand, leather is a natural material and often a byproduct of the meat industry, using hides that would otherwise be waste. This can be seen as an efficient use of resources (turning waste into durable goods). On the other hand, traditional leather tanning (especially chrome tanning) involves chemicals and processes that can be harmful to the environment if not managed properly. Here are some key points:
- Tanning Processes: Vegetable tanning uses organic tannins from bark and plants. It’s generally considered more environmentally friendly than chrome because it avoids heavy metals. However, it uses a lot of water and takes longer. Tannery effluent from veg tan is not as toxic, but still needs treatment due to organic load. Chrome tanning uses chromium salts; it’s very efficient (tans in a day) and produces soft leather, but generates toxic waste (chromium III can oxidise to chromium VI, which is carcinogenic).
Modern tanneries that are reputable have wastewater treatment to capture and neutralise these chemicals, greatly reducing pollution. When buying leather, if sustainability is a priority, look for tanneries certified by groups like the Leather Working Group (LWG), which rates environmental performance. Also, chrome-free leathers are now offered (using alternative tanning agents like glutaraldehyde or titanium) – these are often aimed at automakers and baby products to avoid chrome. They can have performance similar to Chrome-Tan and are worth considering for eco or allergy reasons. - Pollution and Waste: In the past, tanning was quite polluting (there are rivers in some regions that ran different colours from dyes). Today, many tanneries in developed countries have to meet environmental regulations, so they recover or treat chemicals. But in some areas, lax enforcement means problems. This matters as a consumer insofar as which country or supplier you get leather from. If you want to support sustainable practices, you might choose leather from tanneries with a known environmental commitment (e.g., some Italian veg-tan consortium tanneries pride themselves on traditional, eco-conscious methods, recycling of water, using bark waste for fertiliser, etc.). Additionally, consider the longevity of leather: a well-made leather item can last decades, which offsets the initial footprint by avoiding the need to replace it often (versus fast-fashion plastic alternatives that wear out quickly).
- Vegan Alternatives: Synthetic “vegan leather” avoids animal use, but comes with its own environmental issues. PU and PVC leather are plastic – they’re made from fossil fuels and are not biodegradable. PVC is especially problematic when disposed of, as it can release dioxins if burned and doesn’t break down. PU is somewhat better, but still plastic. They also usually have a shorter usable life (peeling and cracking) so you may end up discarding and buying more frequently. There are emerging bio-based leathers (like mushroom leather, pineapple fibre “Piñatex”, cactus leather). These are promising, but still in early stages and haven’t fully matched the durability of animal leather as of 2025. If one’s goal is to avoid animal products, these could be explored, but from pure sustainability, one should examine their manufacturing footprint, too. For instance, pineapple leather uses agricultural waste (good), but often still has a polyurethane resin coating for stability (not so good).
- Leather vs Textile vs Plastic: It’s a nuanced comparison. A well-cared-for leather couch might last 30 years; a fabric one, maybe 15 before reupholstery, a faux leather one, maybe 5 before it cracks. There’s an argument that durable, long-life products are more sustainable in the long run, even if their initial footprint is larger. Leather is also repairable – you can re-dye, refinish, or patch leather in many cases, whereas peeling faux leather is basically unfixable, destined for landfill. On the flip side, leather is not recyclable in the way metal or glass is – once tanned, you can’t easily turn it into a new hide (apart from making bonded leather, which is downcycling). Old leather can be repurposed by cutting it into smaller goods, though.
- Biodegradability: Veg-tan leather will biodegrade eventually (it’s essentially organic material), though the rate is slow and depends on conditions (and surface finishes can impede it). Chrome-tan leather biodegrades much more slowly due to the stable complex of chromium and collagen – it’s somewhat inert. That said, it will still break down over many years, unlike a chunk of PVC which could persist for centuries. If put in a landfill, leather doesn’t leach microplastics, which is a plus over synthetic materials. But chrome from landfill leather could possibly leach if in a very acidic environment, albeit unlikely in significant amounts.
- Animal Ethics: While not an environmental issue per se, it’s tied to sustainability discussions. Leather comes from animals – cows, goats, sheep, pigs, etc., and also exotics like alligators or ostrich. For common leathers they are largely byproducts of meat and dairy. If people stopped eating beef, the availability of cowhide would drop drastically (and indeed, if hides are not used, they become waste to dispose of). Using the hide is more sustainable than discarding it. However, some animals (like certain reptiles) are farmed primarily for leather (and meat second), raising concerns about wildlife and ethical treatment.
Sustainable sourcing here means ensuring no endangered species are used (CITES regulations) and that animals are treated humanely. e.g., “ethical leather” initiatives try to source from farms with good animal welfare. This can be hard to verify. If this is important, one might research the tannery’s sourcing or opt for leathers from countries with strong standards. - Waste Reduction & Upcycling: As a leatherworker, you can practice sustainability by using all parts of the hide efficiently and reusing leather. Plan your cuts to minimise waste (many large scrap pieces can become small goods like key fobs, etc.). Save offcuts for testing dyes or making small items. Some makers even mulch tiny scraps to use in composite or for padding. If you have leather you don’t need, offer it to others (there are scrap exchange groups). Also consider upcycling: old leather jackets or bags can be cut up and turned into new projects (wallets from an old coat, for example). Thrift stores often have cheap, large leather garments that provide material – repurposing them is sustainable and cost-effective.
- Sourcing Leather Responsibly: When buying new leather, consider suppliers that emphasise sustainable practices. For veg-tan, the Italian Consortium “Pelle Conciata al Vegetale” promotes environmentally friendly tanning using natural tannins and proper waste management. Some modern chrome tanneries have closed-loop systems to recycle chromium and water. They may advertise as ISO 14001 certified or LWG Gold rated. If in doubt, ask suppliers for info on the leather’s origin and tanning. There’s a growing movement of transparent sourcing – like vegetable tanners who do tours and show that their wastewater is cleaned and solids composted, etc.
In summary, leather isn’t a clear-cut villain or saviour in sustainability. It sits in a cycle – part of agriculture. The best we can do is use leather judiciously: buy quality leather that lasts, maintain products so they live longer, repurpose leather instead of trashing it, and support tanneries and manufacturers that follow environmental safeguards.
Also, disposing of leather products responsibly at the end of life (they will degrade in compost over time if veg, or maybe find creative reuses).
From an individual crafter's perspective, one sustainable approach is making items to last. A hand-crafted leather item that someone uses for 20 years and maybe passes down – that’s a strong counter to throwaway culture. So by mastering those techniques and caring for leather properly, you’re inherently pushing for sustainability through longevity.
Sourcing Leather and Materials
Obtaining good leather and materials can be a challenge, especially for hobbyists or those on a budget. Here are some tips:
Buying Leather Sides/Hides
Leather is often sold by the side (half a cowhide), hide (whole for smaller animals), or by specific cut (shoulder, back, belly). If you need larger pieces (for upholstery or big patterns), get a side or hide so you have a continuous area. For smaller goods, you can buy cut pieces like shoulders or double shoulders (great for belts, carving, etc., with nice shape and thickness).
Bellies are cheaper but tend to be stretchier and irregular – okay for small parts or practice, but not structural pieces. When buying, ask for the grade (higher grade = fewer scars/marks). Also specify if you need it split to a certain thickness. Many suppliers will split a hide to your desired weight.
Where to Buy
You can buy from speciality leather suppliers (Tandy Leather, Weaver Leather, etc. in the US; LeatherCraftSupplier, etc. in the UK/EU) who cater to small buyers, or direct from tanneries if you need bulk.
There are also many online retailers that sell sides or even smaller pre-cut pieces (panels). If you’re a hobbyist, consider buying leather “bundles” or scrap bags – e.g., upholstery shops sometimes sell offcuts, or suppliers offer pound bags of assorted leather.
While random, these can be great for small projects and practice without a big cost. Just ensure you know what type in case you plan a specific technique (e.g., scrap bag might mostly be chrome-tan upholstery pieces which you can’t tool, etc.).
Upcycling
As mentioned, thrift shops, garage sales, or your own closet could yield leather garments that are no longer wearable but have material. A large coat can provide a lot of soft leather (often chrome-tan lamb or cow split), good for small accessories.
Old leather sofas (if you find one being thrown out) – you can strip the leather upholstery off and salvage big panels (just note many sofas are a mix of genuine leather and matching vinyl on sides/back, check for that).
Even old handbags can be cut up for pieces, and often have ready-made straps or hardware you can reuse (recycling hardware is a good hack: high-quality buckles, D-rings, etc., can be harvested from discarded items). This approach saves money and is eco-friendly.
Selecting for Project
Match leather type to project needs as we’ve outlined. If making a wallet, don’t buy super thick saddle leather and struggle splitting it down – instead, get a thinner piece or a type known to be supple (like goat or calf). Conversely, for a sheath, don’t use garment leather; source some veg-tan shoulder of proper thickness.
If unsure, talk to the supplier – they often guide you (e.g., say “I need leather for belts” and they’ll point to veg-tan strips or bridle sides, etc.).
Cost Considerations
Leather pricing varies widely. Chrome-tan upholstery sides might be £5-7 per square foot, high-end bridle leather may be £10-15/ft, exotic skins much more. Veg-tan tooling leather is often around £8-12/ft for decent grade. To minimise cost: buy only as much as you need (many suppliers will cut 1/4 or 1/2 of a side if you ask).
Check if your area has a leatherworking guild or community – members sometimes do group buys to save. Also, outlet stores or tannery outlets sometimes sell leather lots cheaply (maybe odd lots, overruns, slightly off-color batches).
Another tip: remnants – many suppliers have a remnant bin or clearance for pieces with blemishes or irregular shape, at a discount. If you can work around defects or only need smaller pieces, this is gold.
Sourcing Other Materials
Threads: For hand sewing, you can get waxed polyester threads, or waxed linen thread. These last a long time since a spool goes far. For machine, outdoor poly or nylon upholstery threads from brands like Coats or A&E work well – check sewing suppliers.
Finishes and Glues: Products like Fiebing’s dyes, Eco-Flo dyes (water-based), etc., from leather retailers; contact cement you can get at Algeos. If in a pinch, even high-strength PVC glue can work, but dedicated leather cement is best.
Hardware: You can salvage as mentioned, or buy from leather supply shops (they often have better quality solid metal hardware vs craft store). There are also specialised hardware suppliers if you want, say stainless steel for marine/outdoor or specific buckle styles.
Tools: Starter kits can be a cost-effective introduction (they usually have a basic set of awl, beveler, needles, etc.). But often those tools are lower quality. It might be better to buy a few good tools as needed rather than a big kit of mediocre ones. A good knife and edge beveler, for example, will serve better than 10 cheap stamping tools if your focus isn’t stamping. Look for known brands or even vintage tools (old Osborne tools, etc., can often be restored and are high-quality steel).
Try Locally: Some cities have leather supply stores where you can actually handle leather before buying – this is ideal to understand thickness and temper. Also, upholstery shops or shoe repair shops might sell you leather or give scraps if you ask nicely (as noted, upholsterers often have scraps that’re big enough for small goods and are happy to have someone use it). Just be sure to reciprocate business or goodwill.
Storage: Once you have leather, store it properly: a cool, dry place, flat or rolled (not folded, which causes creases). Avoid direct sunlight (will darken veg-tan and fade others). If long-term storage, occasionally check and maybe condition if it starts to dry. Pests generally don’t eat tanned leather, but very humid conditions can mould it – so a dehumidifier in damp climates is good.
All these points ensure you get the most out of your materials. By sourcing smartly and taking care of what you have, you’ll save money and be kinder to the environment.
Conclusion - the journey of Leatherworking
Working with leather is a rewarding fusion of art, craft, and engineering. In this guide, we’ve covered the spectrum: from understanding different leather types and their ideal uses, through step-by-step techniques of cutting, stitching, and finishing, to specialised knowledge for applications like shoes, saddlery, upholstery, and more.
Whether you’re a beginner crafting your first wallet or a seasoned artisan upholstering a classic car interior, the keys to success include choosing the right leather, using the proper tools and methods, and practising patience and precision. Treat the material with respect – both in how you physically handle it and how you source and sustain it – and it will reward you with items of lasting beauty, utility, and character.
Leatherwork, at its best, is sustainable craftsmanship: creating durable items, often by repurposing nature’s byproduct, and doing so in a way that marries functionality with aesthetics. With the knowledge shared here, you can confidently select the appropriate leather for any project, work it safely and skillfully, and care for it so it stands the test of time.
Whether you’re resoling boots, carving a decorative picture, upholstering a family heirloom chair, or designing a custom orthopaedic brace, you now have a comprehensive foundation to build upon.
Happy crafting – may your leather projects be successful and your learning continual. And remember, every master leatherworker was once a beginner, so keep practising these techniques and don’t be afraid to experiment. The more you work with leather, the more you’ll appreciate the wonderful versatility and tradition bound up in this material. Good luck, and enjoy the journey of leatherworking!
You view Algeos Leathers here >>
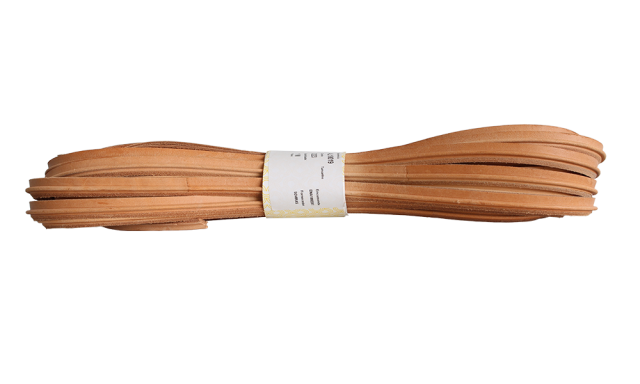
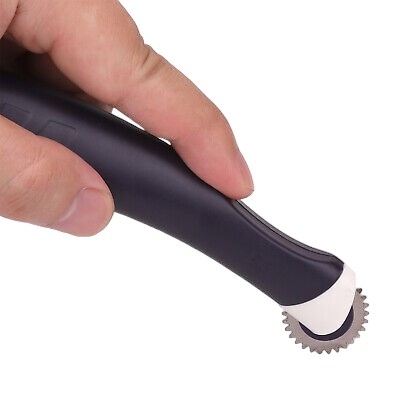

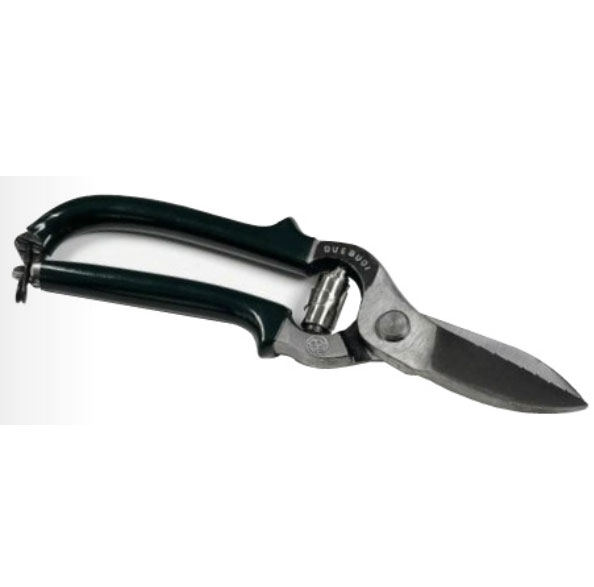
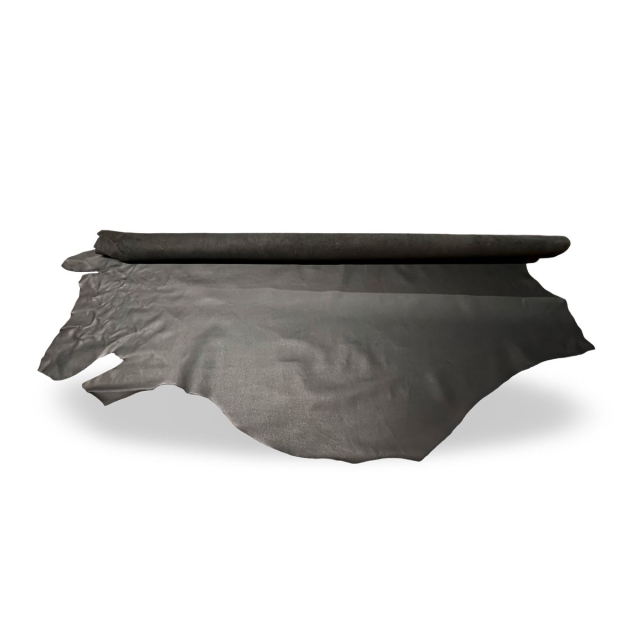
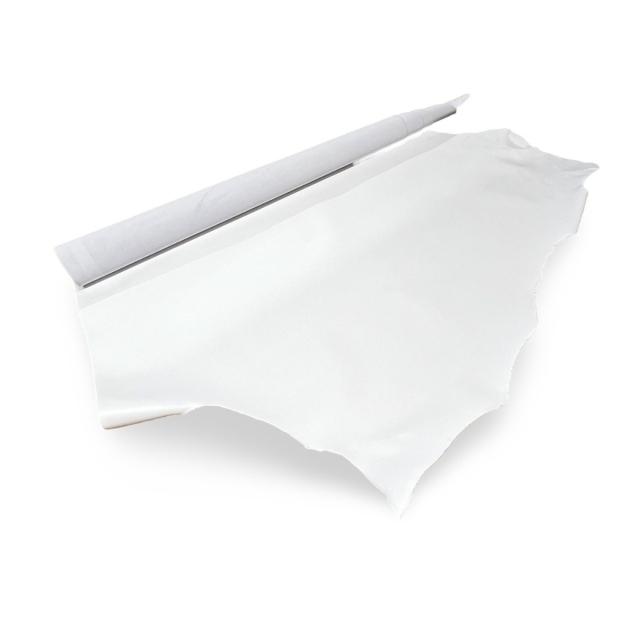
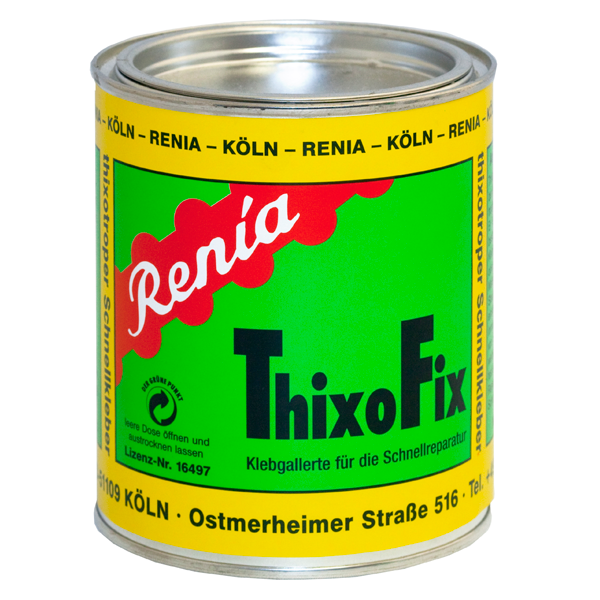
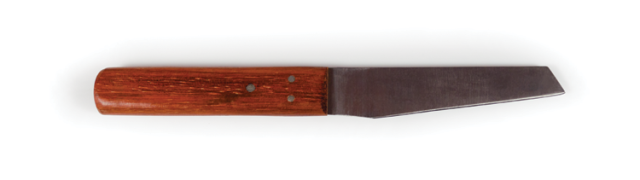
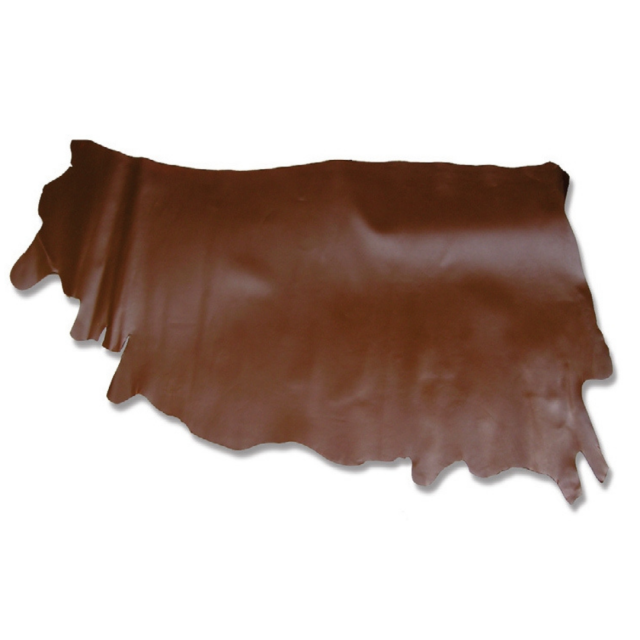
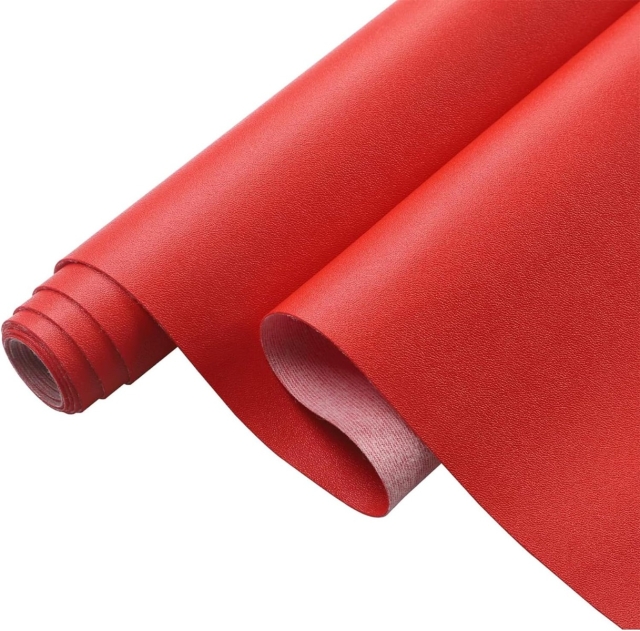
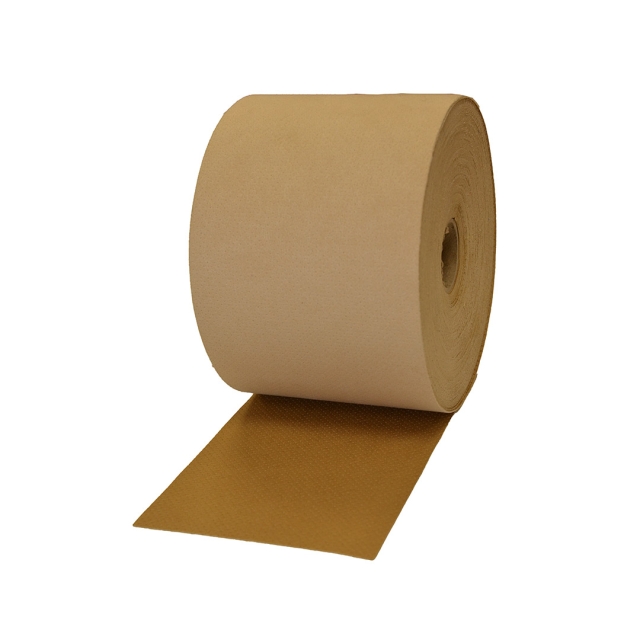
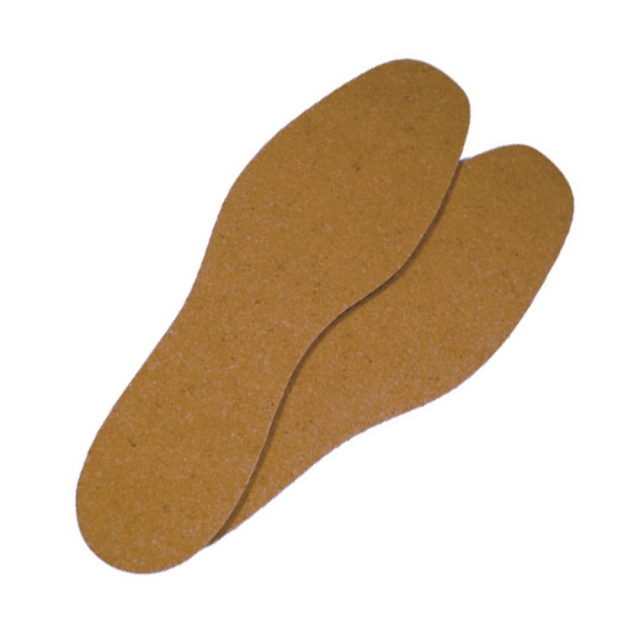
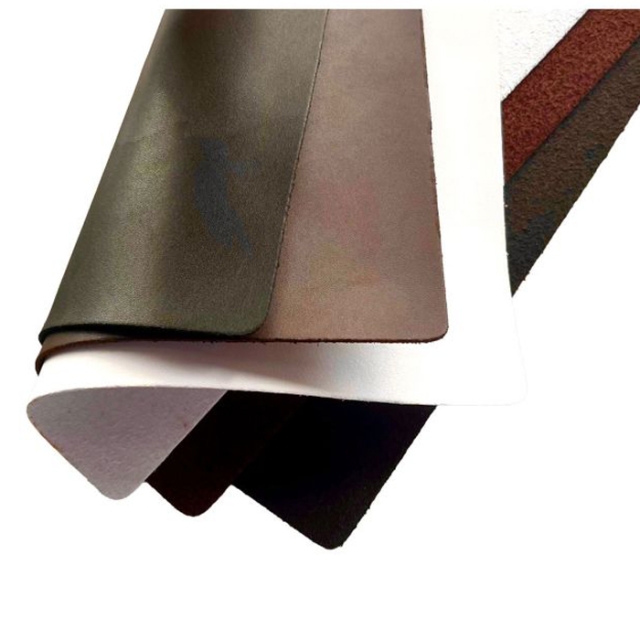
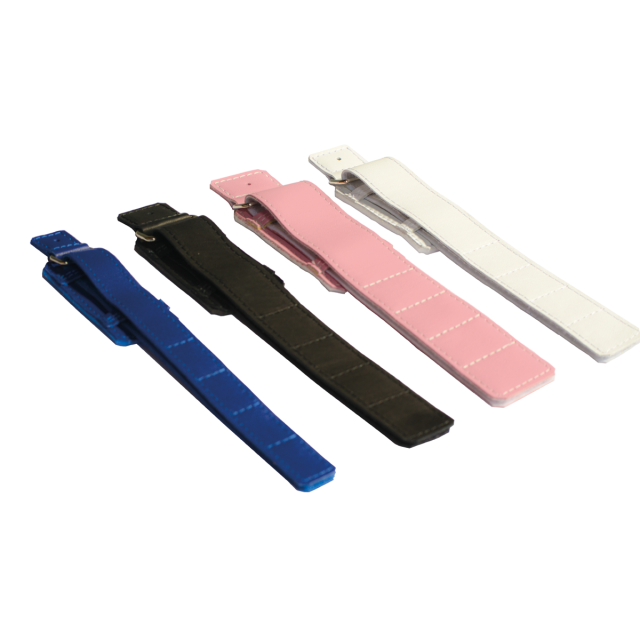
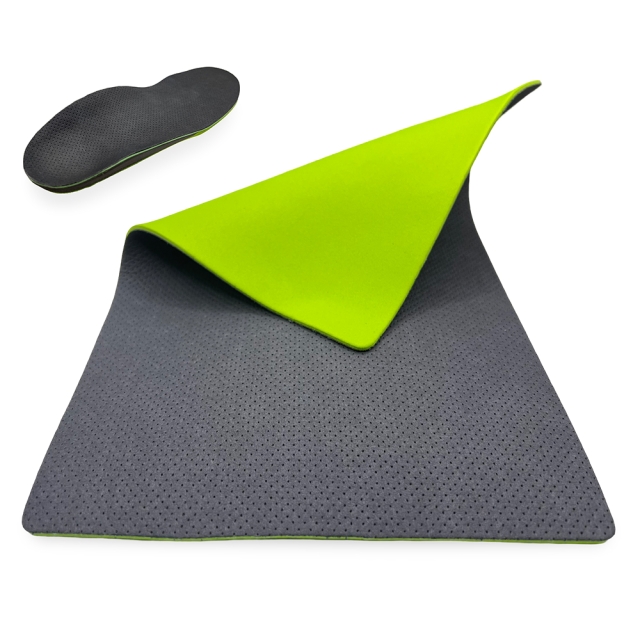

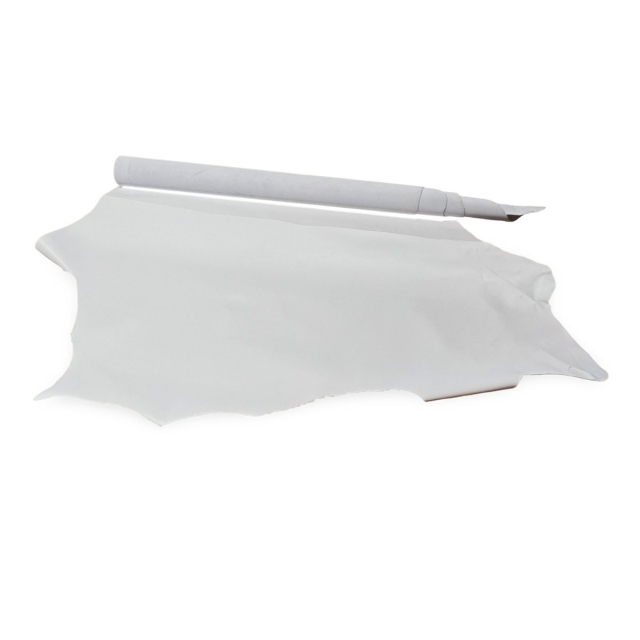
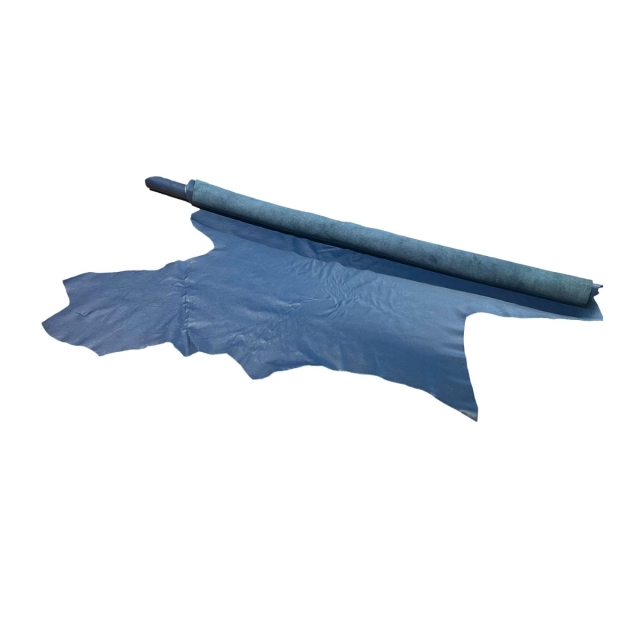
Sold: Sold per Metre - Cut form 50m Roll
Incl. VAT Exl. VAT